Extensions
Athlete2 theme comes with lots of custom made extensions by Olegnax and also Revolution Slider by NwdThemes
Olegnax Layered Navigation
Olegnax Layered Navigation Extension comes with standalone documentation, check it here.
Olegnax Infinite Scroll Extension comes with standalone documentation, you can check it here.
Olegnax Brands
Brands extension is a simple extension to show brands in carousel slider or simple grid. You can check example here: https://athlete2.com/ca/brands-widget
Preparations:
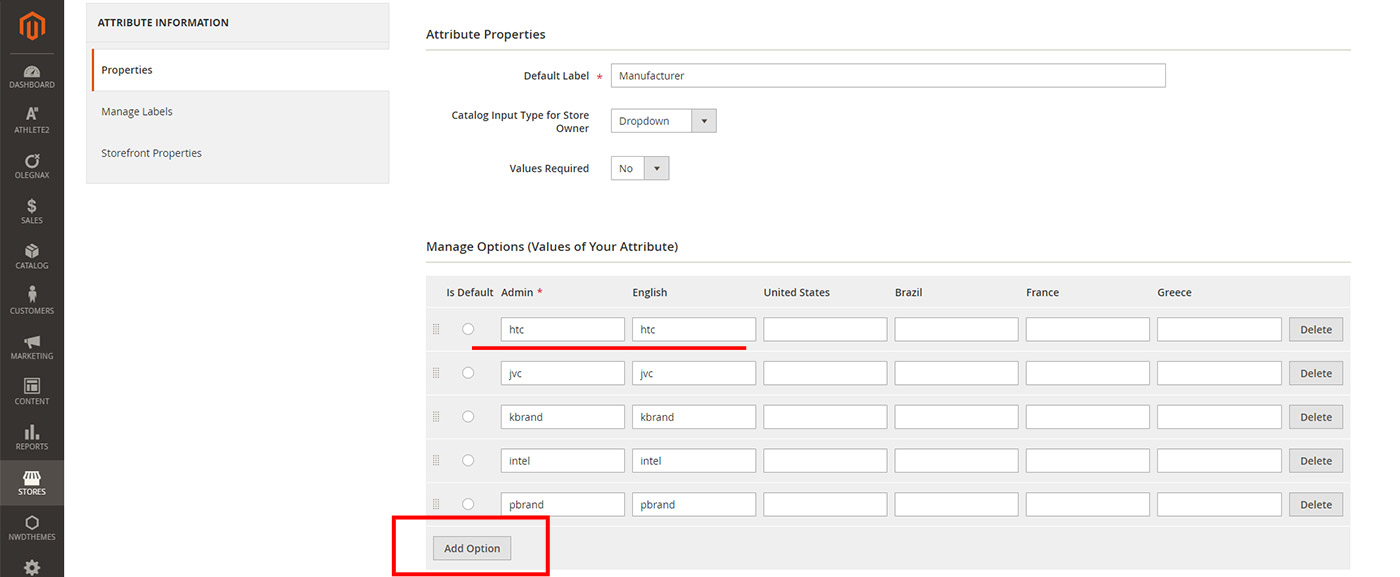
First of all we need to choose attribute that will be used as brands. By default it is manufacturer but you can create your own.

After that navigate to Stores > Attributes > Product and choose your attribute. Click Add option button and create as many brands as you need and add their names in Admin * field.
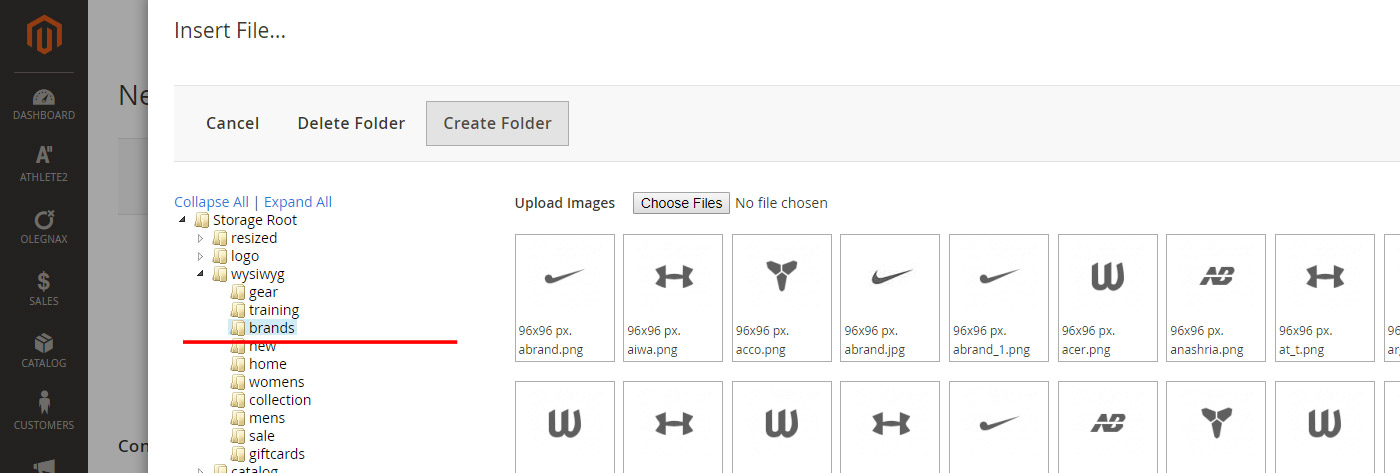
Now create (if it doesnt exist) folder named brands in default magento editor folder wysiwyg and upload your brands images there ( Storage Root / wysiwyg / brands ). Images should be with the same name as in Admin field of your attribute. Do not use special characters! Replace spaces with _ in image name. E.g. "Brand Name" should be "brand_name.png"
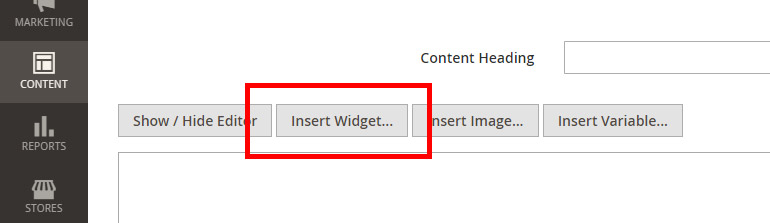
Now you can easily add brands widget to any page or static block. Simply click Insert Widget button and choose Olegnax - Brand Slider
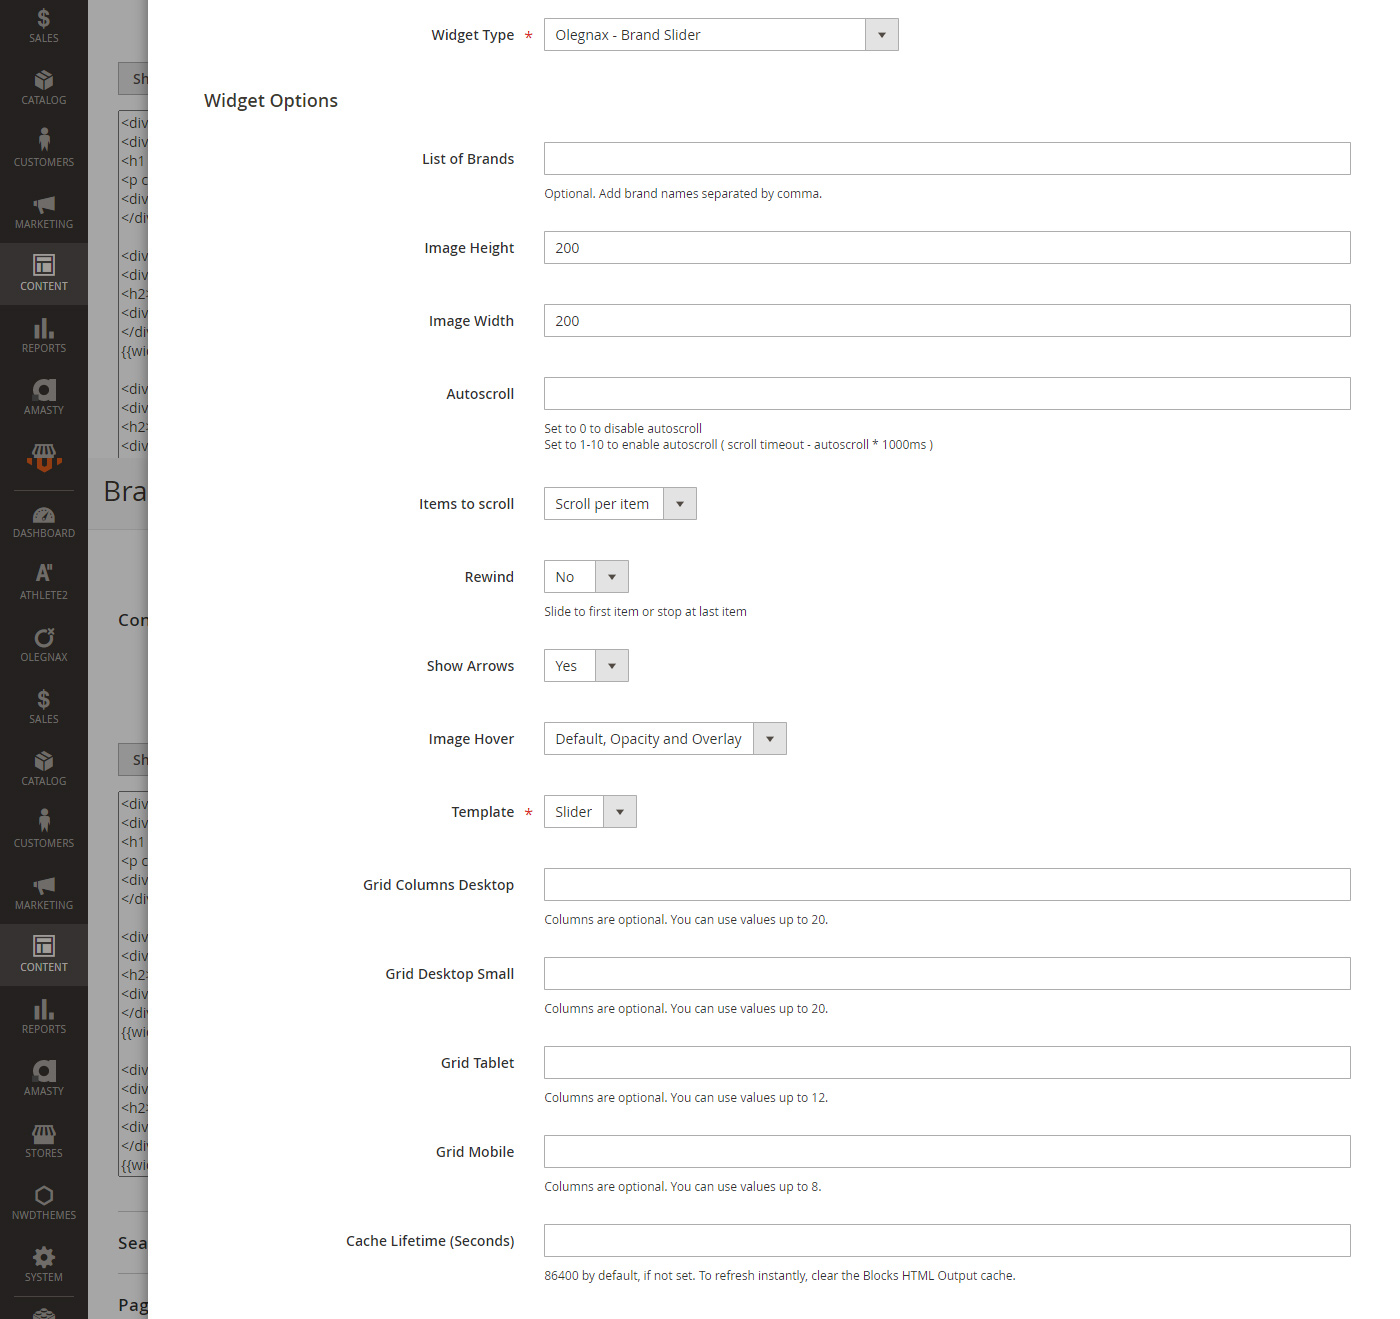
List of Brands - you can choose what brands to show in brand slider/gird. Simply add brand names same as they are set in your attribute, separated by comma e.g.: CC Shoes,Abibas, Athlete2,Holy Haters,Okey,Puma,Salaman
Image Height, Width - this option allows you to set different image size for each brand widget.
Template - this options allows you to choose how to show your brands: in a simple grid or slider. Both examples can be seen here: https://athlete2.com/ca/brands-widget
When Slider selected options above will work such as Items to scroll, Rewind, Show Arrows, Autoscroll.
If Grid selected then you can use below options to adjust grid columns for different screen resolutions: Grid Columns Desktop, Grid Desktop Small, Grid Table, Grid Mobile. These options however are optional. If they not set brand will simply go inline so there will be as many items in row as much can fit in. The size of the brand item will be determined by image width.
How to add banner slider above footer
On our preview we have created static block, added brands slider widget there and then selected this static block in Athlete2 > Theme Settings > Content Area Above Footer
Troubleshooting - Image is missing in brand slider / grid
If brand image is missing information about it will be writter in var/log/oxbrands.log. If you added image but don't see it in brand widget then check this log, most likely you named it incorrectly. From this log you will be able to see what image brand widget is looking for and so how it should be called.
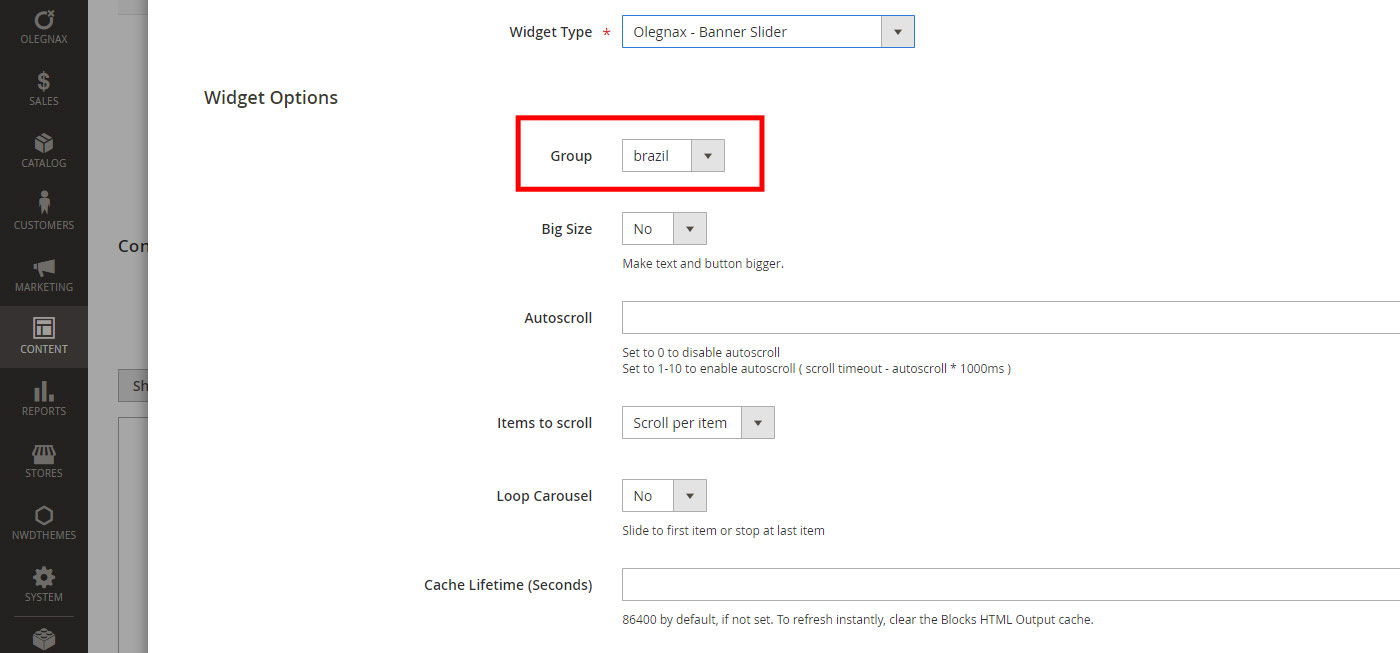
Olegnax Banner Slider
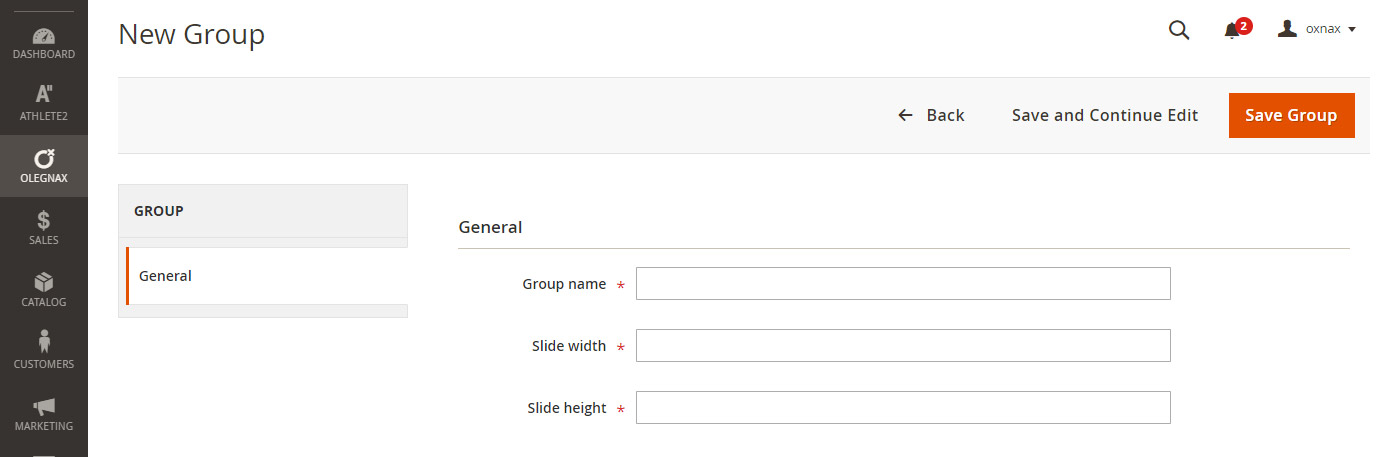
First of all we need to create banner slider group. To do this go to Olegnax > Banners > Group and click Add New Group.

Add unique group name that will be used in slides and widget and set banner sizes. Banner width will determine the amont of slider columns. Slider will always scale images down. For example if your website width is 1400 and banner slider width is 400 you will see 4 banners because 1400/400 = 3.5 and we scale down only. The same login is working for repoponsive. Slider with 400px width will be in two columns on screen resolutions below 800px (till 400px), on 801px it will be 3 columns.
When we have a group lets create some slides in Olegnax > Banners > Slides. Click Add New Slide.
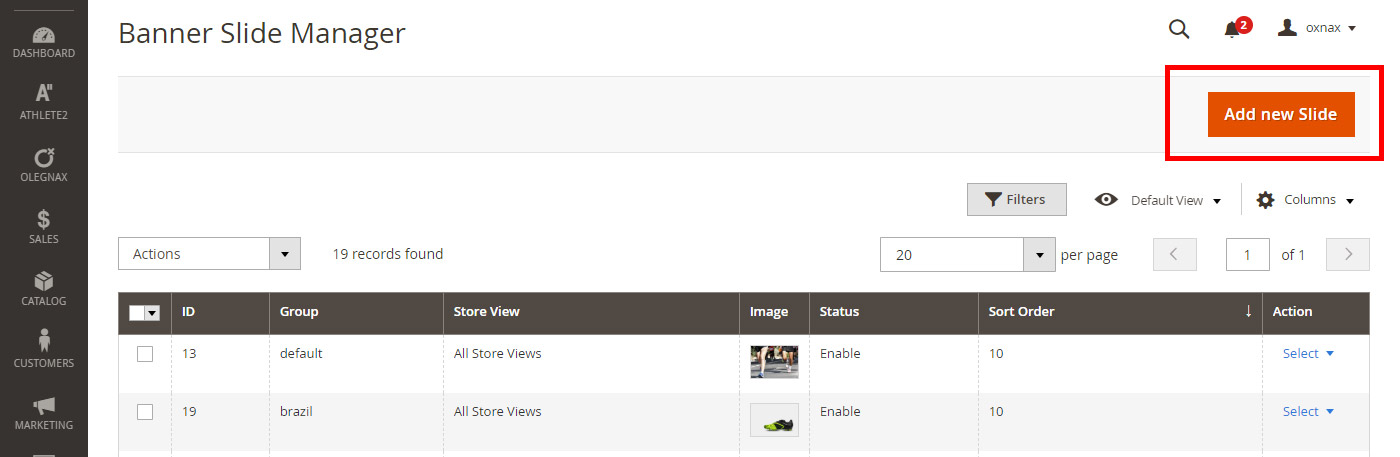
The first thing we need to do is to choose our banner slider group. This allows you to create different banner sliders. Sort order will define position of each slide, smaller value goes first.
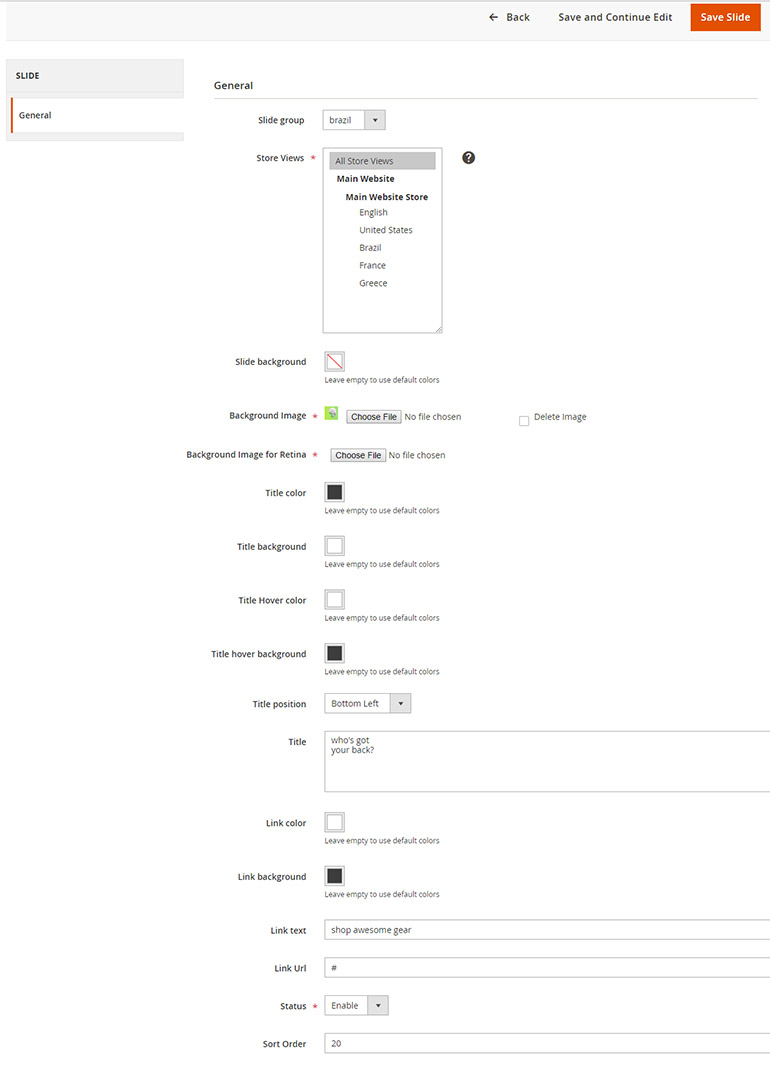
After we created slides you can add banner slider to any content area like pages or static block using widget. Simply click on Insert Widget button when you edit page and choose Olegnax - Banner Slider. After that choose banner slider group. Banner slider has two styles: small and big with different paddings and font size. You can check examples below.

small and big banner slider styles
Olegnax Extended Reviews Summary
Athlete2 theme comes with extended reviews Summary extension which override default reviews list. If you wish to use default reviews list you can disable it in Olegnax > Product Reviews Summary > Configuration
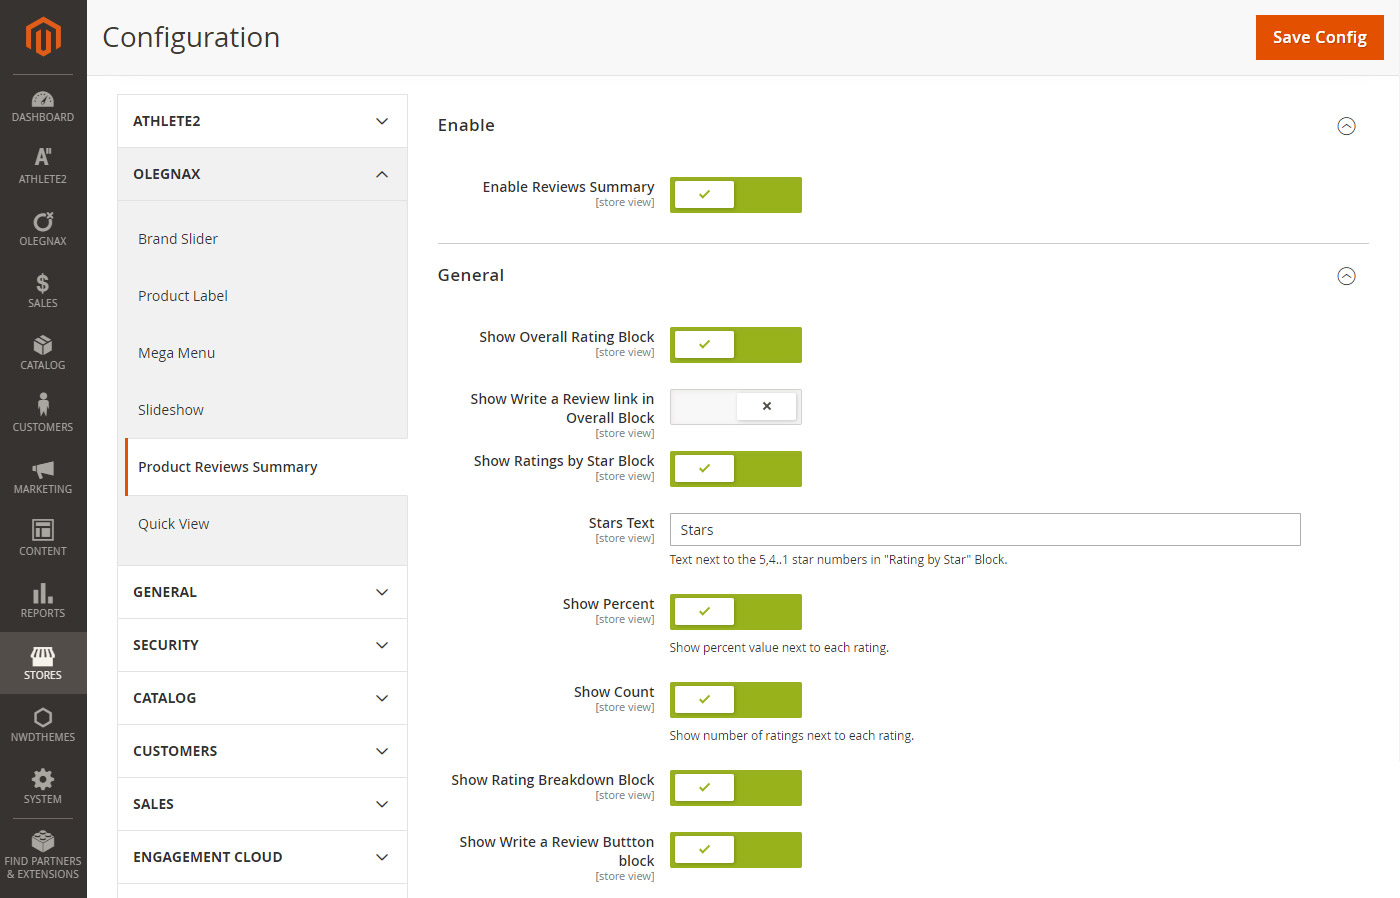
Extended review summary adds 4 new blocks each of which can be disabled separately.
- 1. Show Overral Rating block
- You can also enable disable additional write a review link in first block.
- 2. Show Ratings by Star. You can additionally show hide different information in this block and set text.
- 3. Show Rating Breakdown Block.
- 4. Show write a review button block.
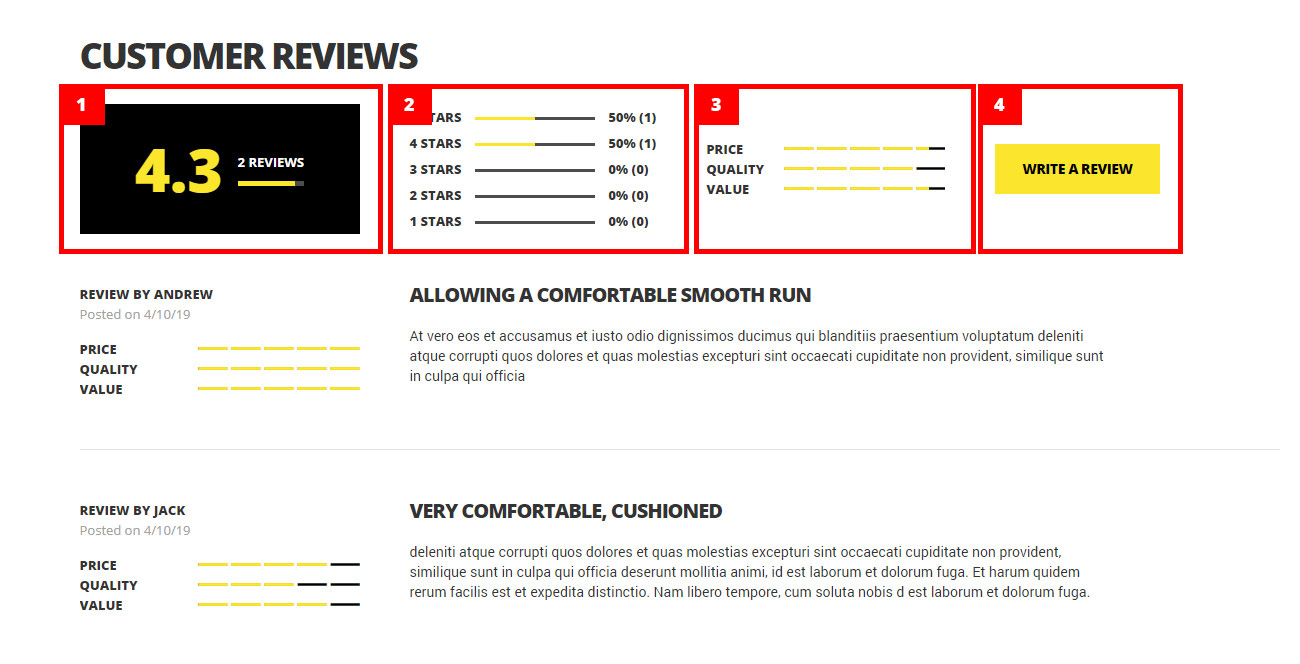
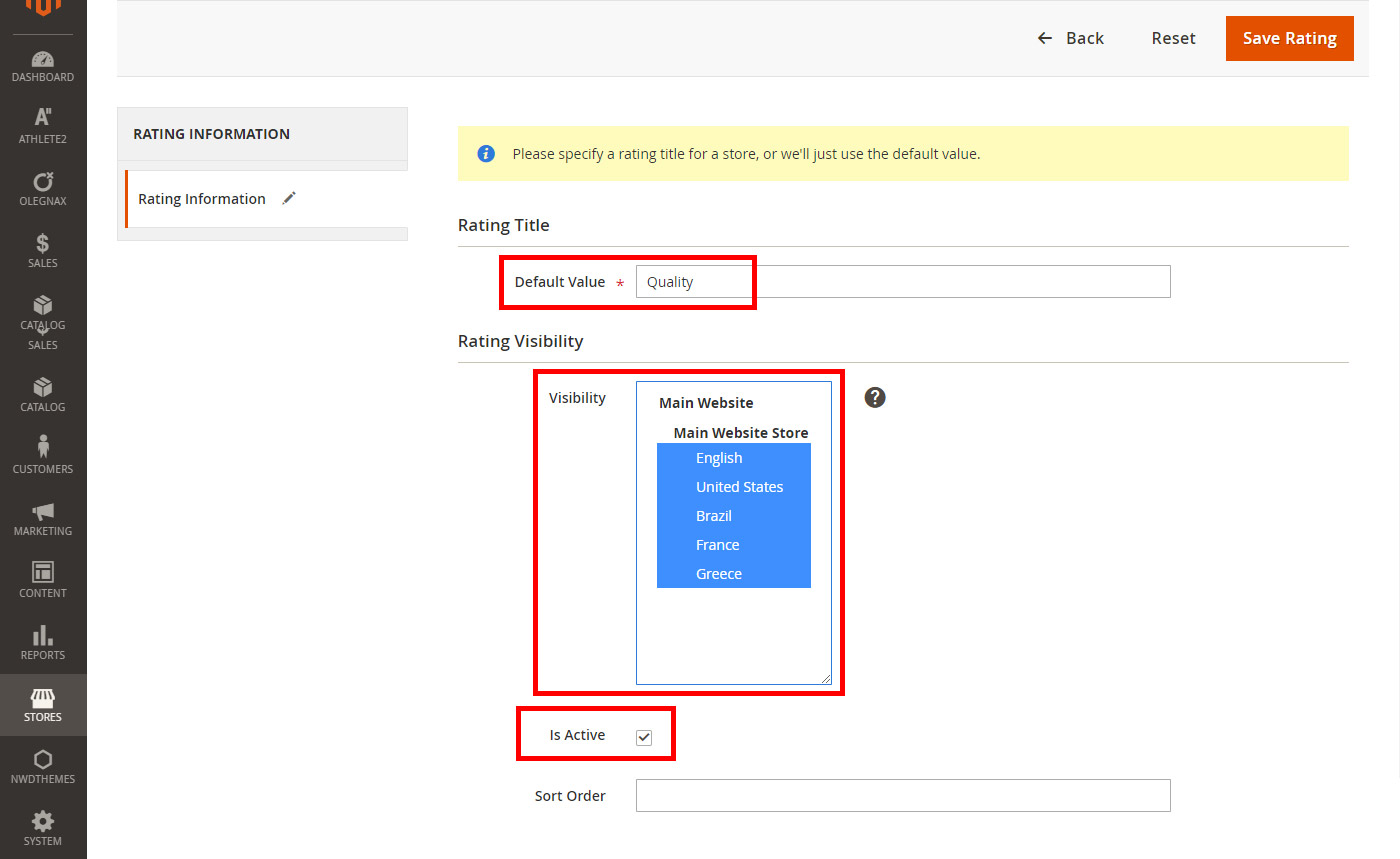
Rating Breakdown Block will appear if you have more than one rating type only. You can add more ratings in Stores > Attributes > Rating, click Add New Rating.
Set rating title, choose store views where to show this rating and don't forget to Activate it!
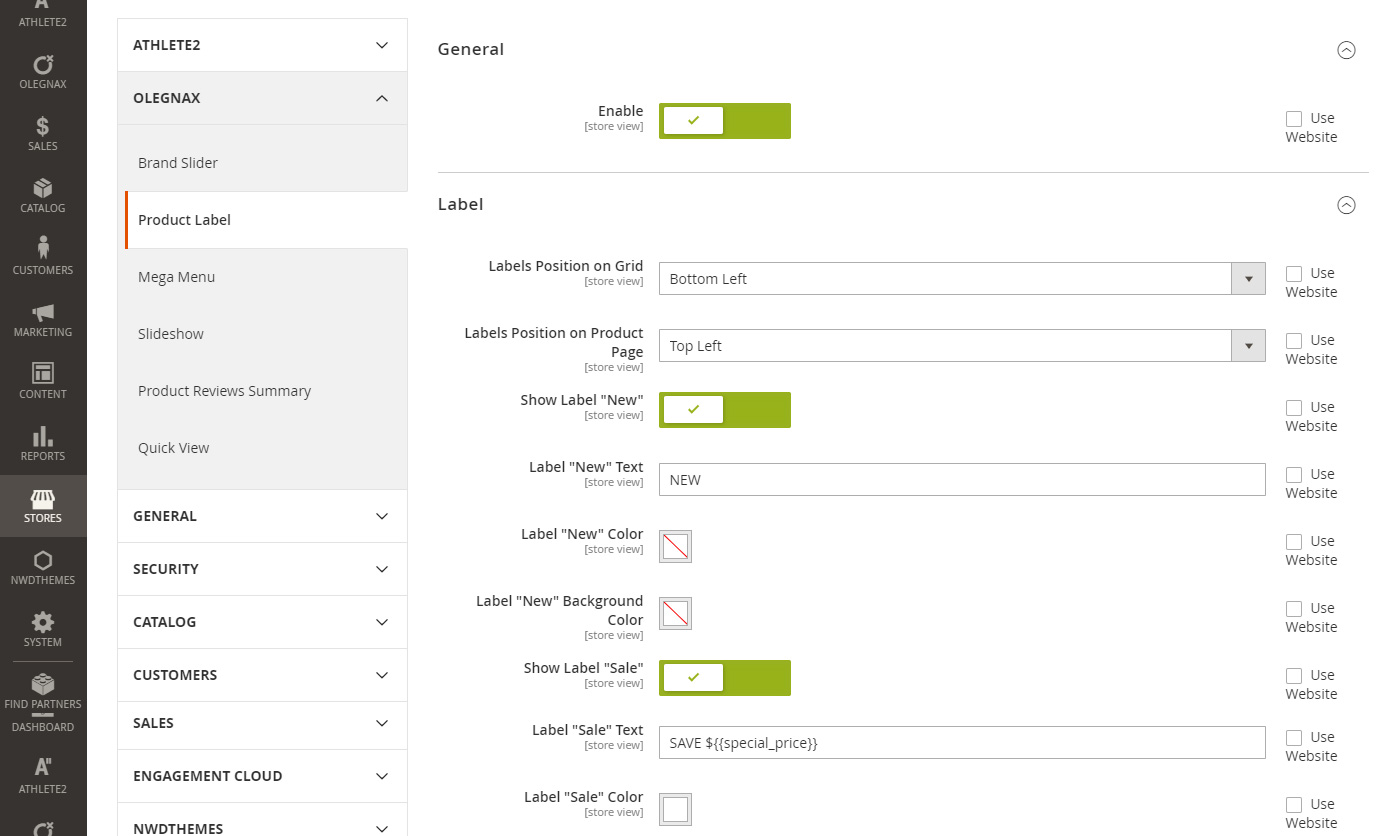
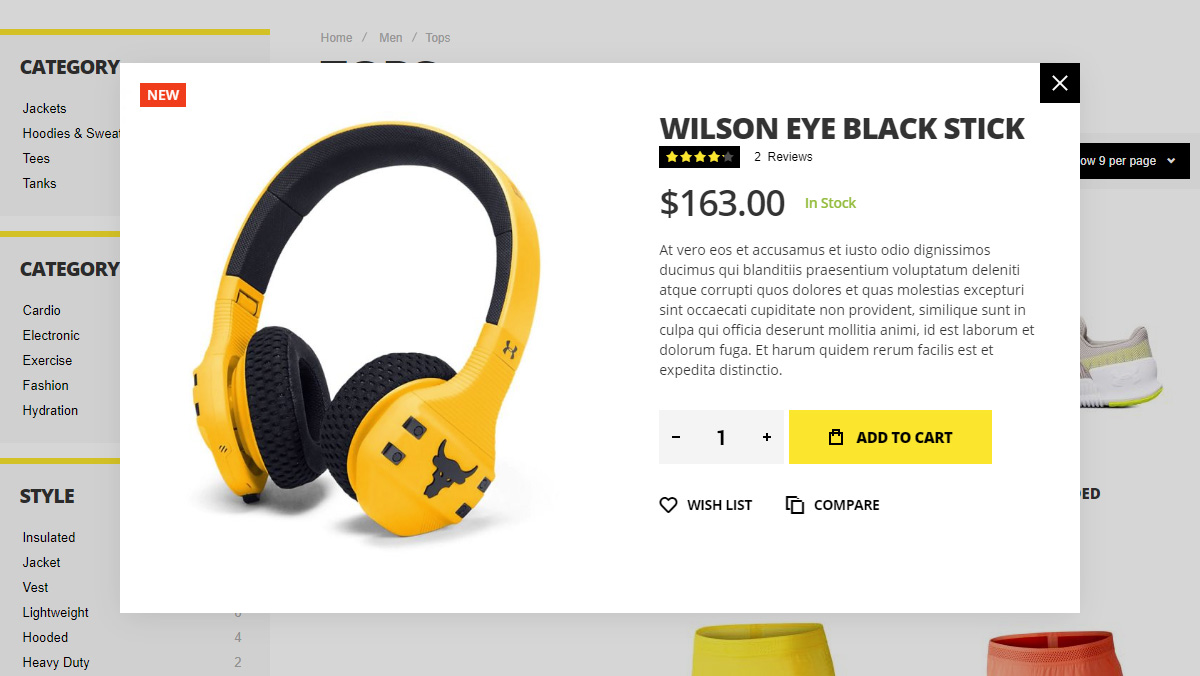
Olegnax Product Labels
You can enable and adjust product labels color, position and text in Olegnax > Product Label > Configuration.
Variables
You can use variables for sale label to show amount or percent of discount. You can add these variables near sale label text:
{{discount}} {{discount_percent}} {{special_price}}
I.e.:
SAVE ${{discount}}
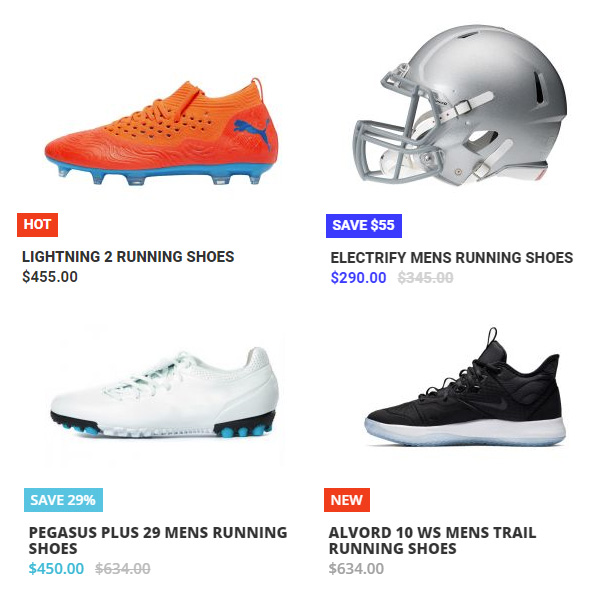
Example of sale labels with different variables.
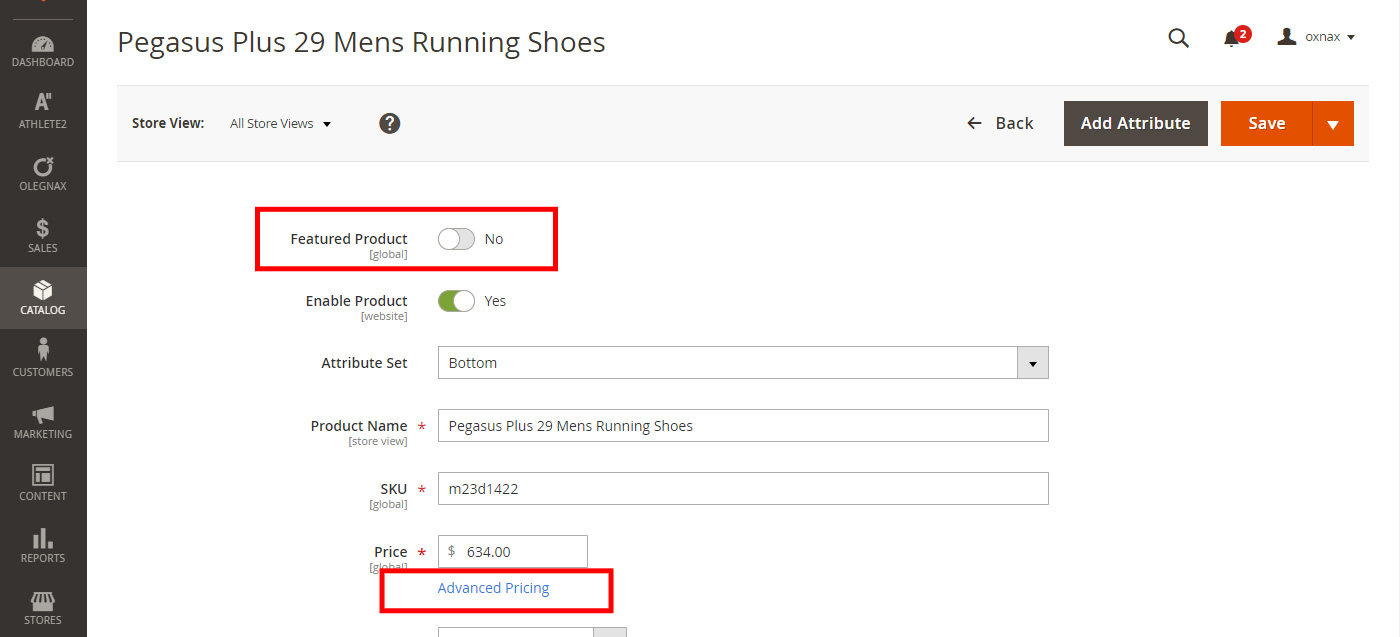
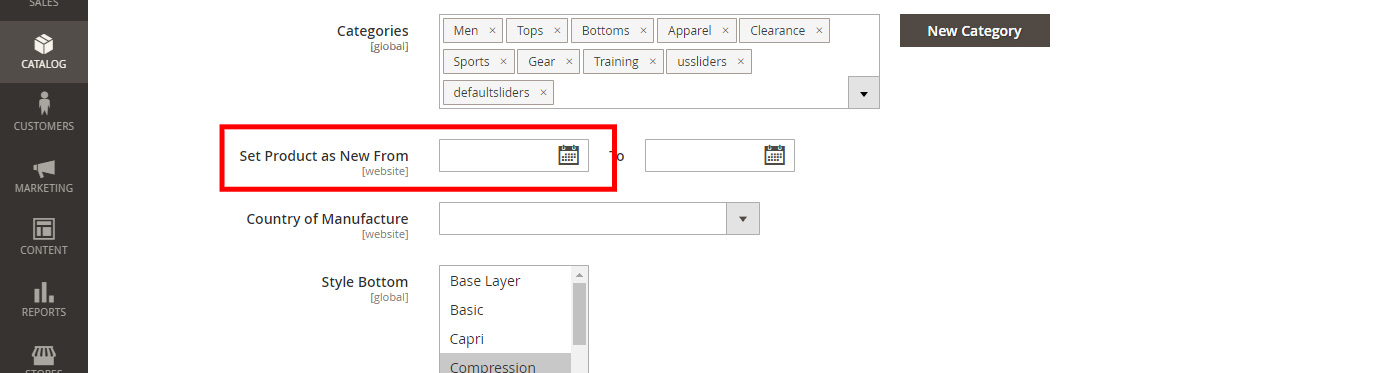
How to set product as new, sale, bestseller and featured.
Bestseller label can't be set it will be added automatically to most selling products. You can however disable it.
New or Sale labels will be n if price/sale price and date from are set. To set starting date for sale product click Advanced Pricing link on product page and set Special Price and Special Price From. There is a switch on product edit page to make it featured. See images below for details.

Olegnax Quickview
Olegnax Quickview can be enabled/disabled in Olegnax > Quickview > Configuration. All elements are taked from the product page. If you change position for actions in Theme Settings it will be also changed in quickview. Quickview button is enbled/disabled on listing (Theme Settings > Product Listing) and Widgets seaparetely.
Social Share and Full screen product image preview are not available in quickview.
Advanced. If you wish to add/remove/change position of some elements in quickview you can find XML files responsible for layout here app\code\Olegnax\Quickview\view\frontend\layout\
Olegnax Products Slider/Grid
Olegnax Products Slider extension comes with various grid and slider layouts. This means you that this is not only a product slider but can also be used as simple product grid.
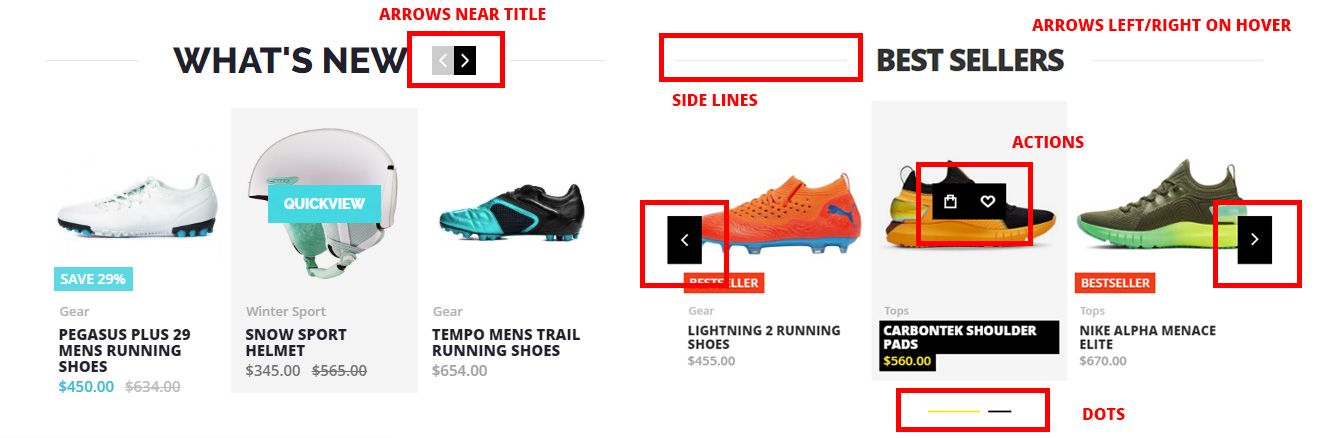
You can choose from a wide range of product grid/slider widget from Products by Category to Most viewed.
Check Olegnax Product labels extension to learn how to make products sale, new or featured. They share the same logic. Bestseller, Most Viewed products and similar will be selected automatically.
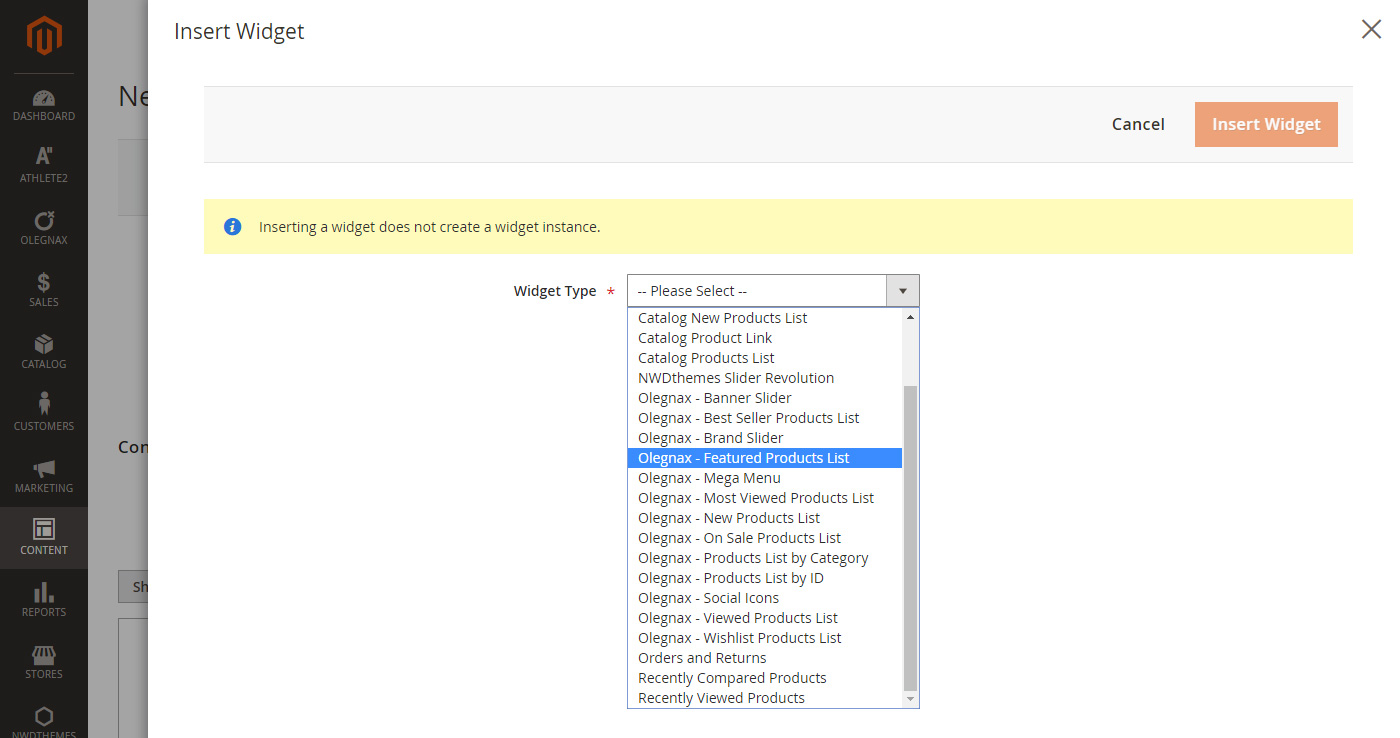
You can add product slider widget to any page or static block same as other widgets, by clicking Insert Widget button when you edit page or through Content > Widgets
You can choose Grid or Carousel layouts in Template select but the options will stay the same for all templates. Options in red rectangle on screenshot below are for carousel templates only.

Olegnax Google Map
Olegnax Google Map Extension comes with standalone documentation, you can check it here.
You can import google map sample settings in Athlete2 / Demo Import separately from other settings. Please note that Locations are not imported. You need to add your locations manually.
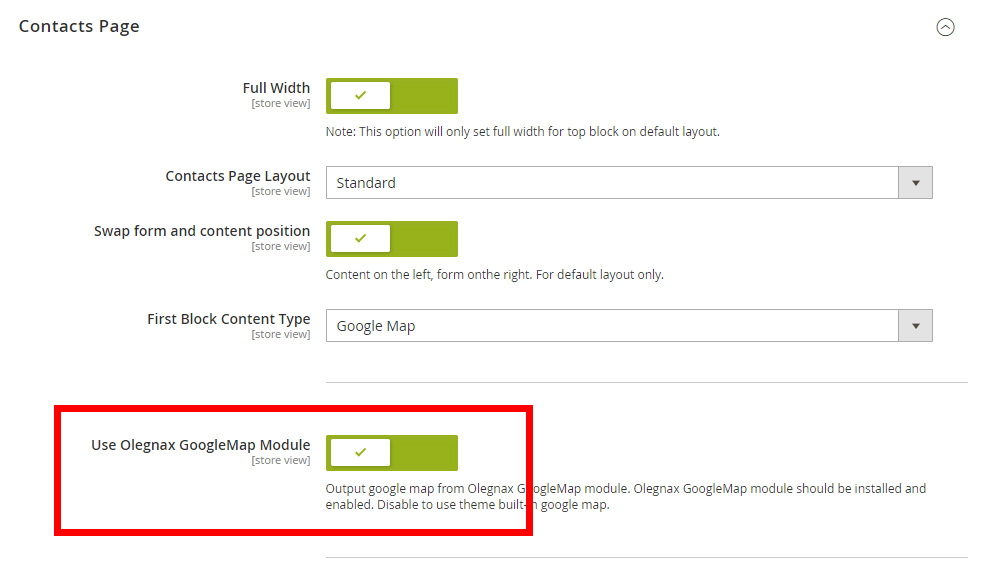
Athlete 2 theme comes with built in functionality for google map on contact page. You need to disable it in order to show google map from this extension on contact page. Navigate to Athlete2 / Theme Settings / Contact Page Page and enable Use Olegnax GoogleMap Module option.
Olegnax Carousel
Carousel module allows to create any carousel slides with any content and place it anywhere using widget. You can for example create small text carousel to rotate announces in header, banners slider with multiple banner per row or a single slide carousel as your main slider.
1.Create Carousel(Group)
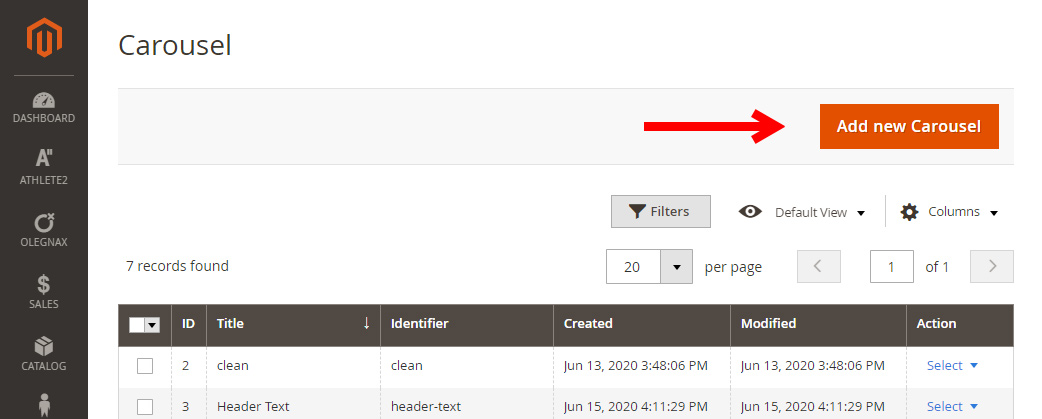
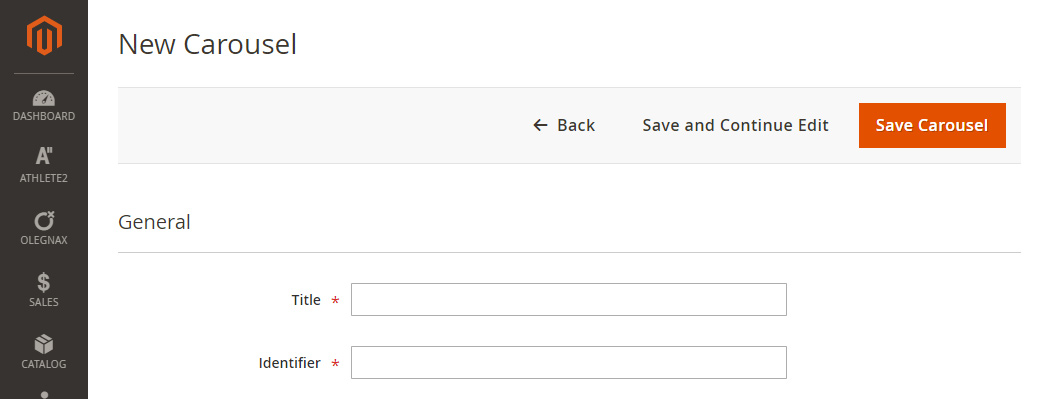
First of all, navigate to Olegnax / Carousel : Carousel and click Add new Carousel
Set carousel name and id. Carousel id is used in widget to choose what slides to show. It is like a group.
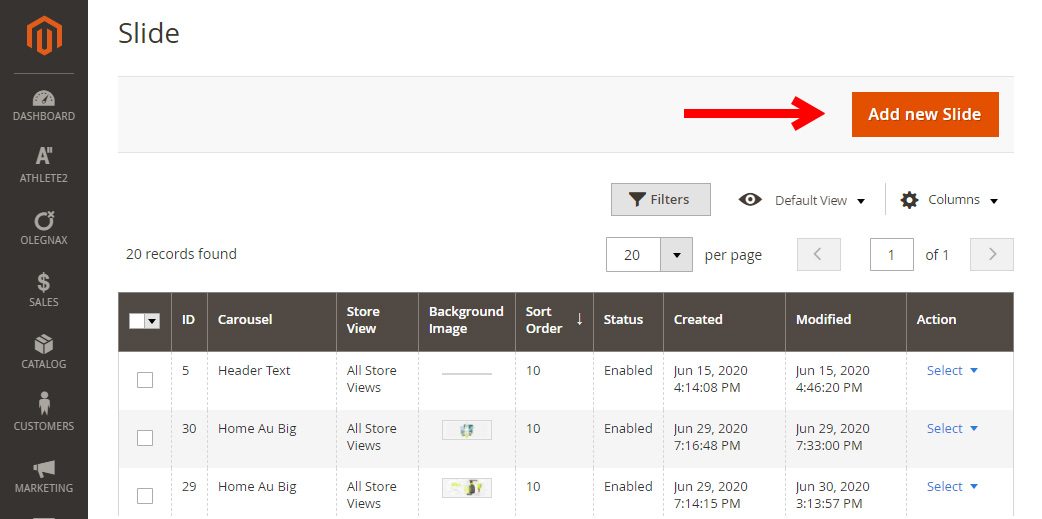
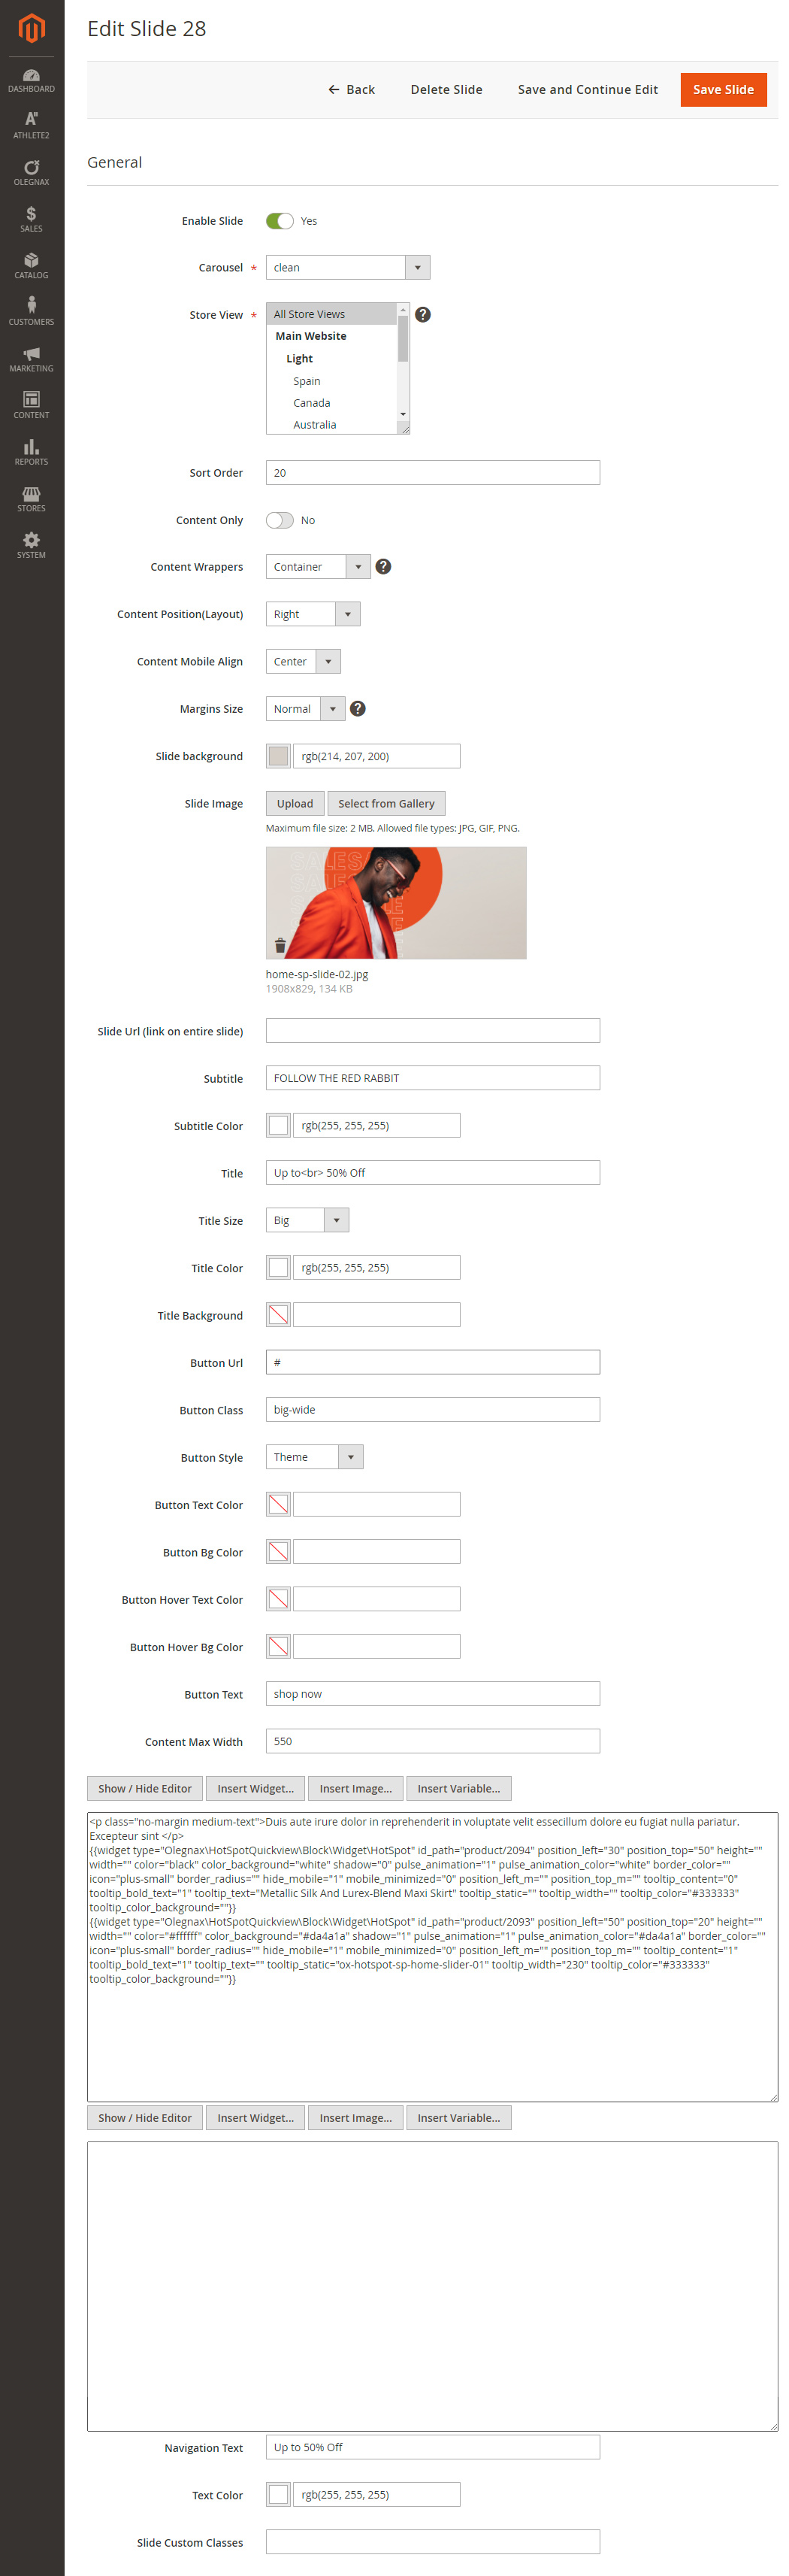
2. Create Slide
Go to Olegnax / Carouse : Slide and click Add new slide
3. Carousel Slide Configuration.
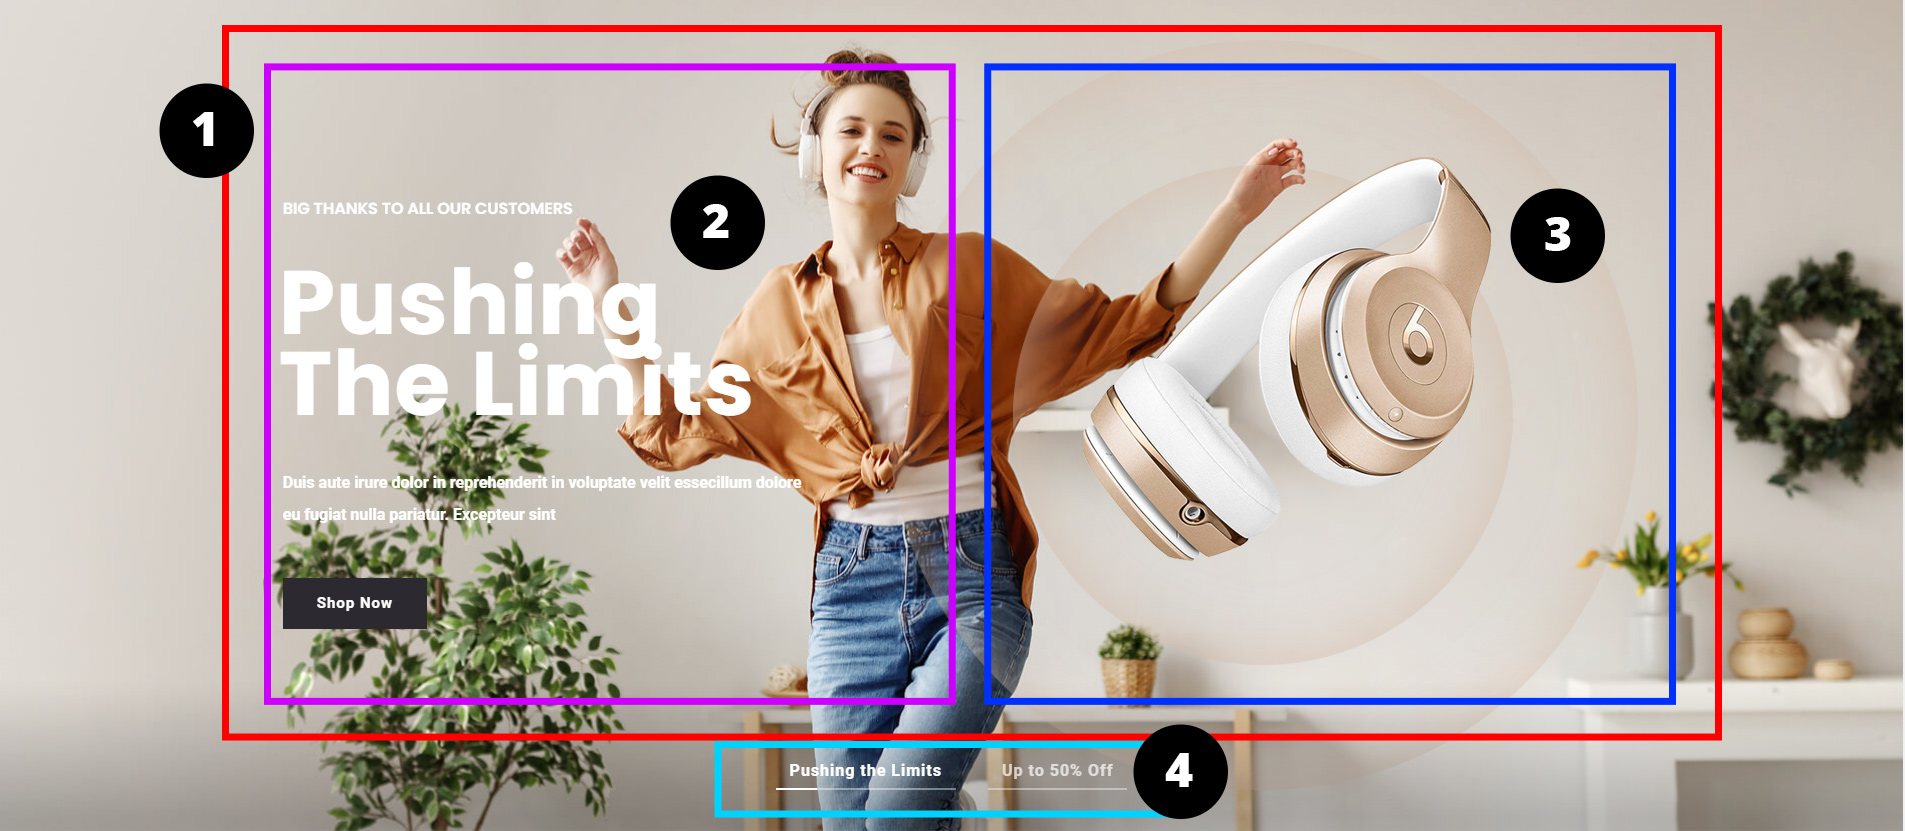
Slide Layout breakdown: 1. Slide Container, 2. Slide Content Left, 3. Slide Content Right, 4. Slide Navigation
Carousel - we created it before (1.Create Carousel). Slides should be assigned to carousel(group). It is used in widget to define what slides to show for each widget. You can create as many carousels(groups) as you want and assign different slides to it.
Sort Order - you can set order of slides in carousel.
Content Only - with this option enabled title, subtitle and button options will be ignored.
Content Wrappers - choose how to wrap content. "Container"(1) wrapper is the same as in content. It will limite slider content max width to website content width. This option is useful if you use slider in a fullwidth layout or outside of the content area. Inside of the content area it is excessive and will add extra paddings. "No Container" - slide content will have no width limits and will take the slide width. "Raw" - with this option enabled only content area will be output, without any wrappers. Slide layout, content align, position and other options will not work. Use this if you want to create completely custom content inside of the slide.
Content Position(Layout) - This option allows to control position of slide content(2). By default it will take 50% of the slide width and be placed either left, right or centered. But you can also choose 2 columns layout here. In this case you will have two content areas(2)(3) on the slide. Each takes half of the slide.
Content Mobile Align - change content align for mobile only (below 768px).
Margins Size - adjust space between Title, subtitle, button and content elements. Only works for elements defined in slide settings.
Content Max Width - by default content(2) takes 50% of the slide width but you can change it using this option. Value will be set in px.
Content Areas - you can see two content areas. First of is main content area which is always enabled. Second content area work only when 2 columns layout selected.
Navigation Text - use this option to add text to slide navigation/dots (4). Additionally you need to choose appropriate navigation style in widget.
4. Add carousel slider to content.
You can add carousel anywhere using widget. To do this simply click Insert Widget button when you edit page or other content area and choose Olegnax - Carousel.
For more details: How to insert widgets in Magento 2
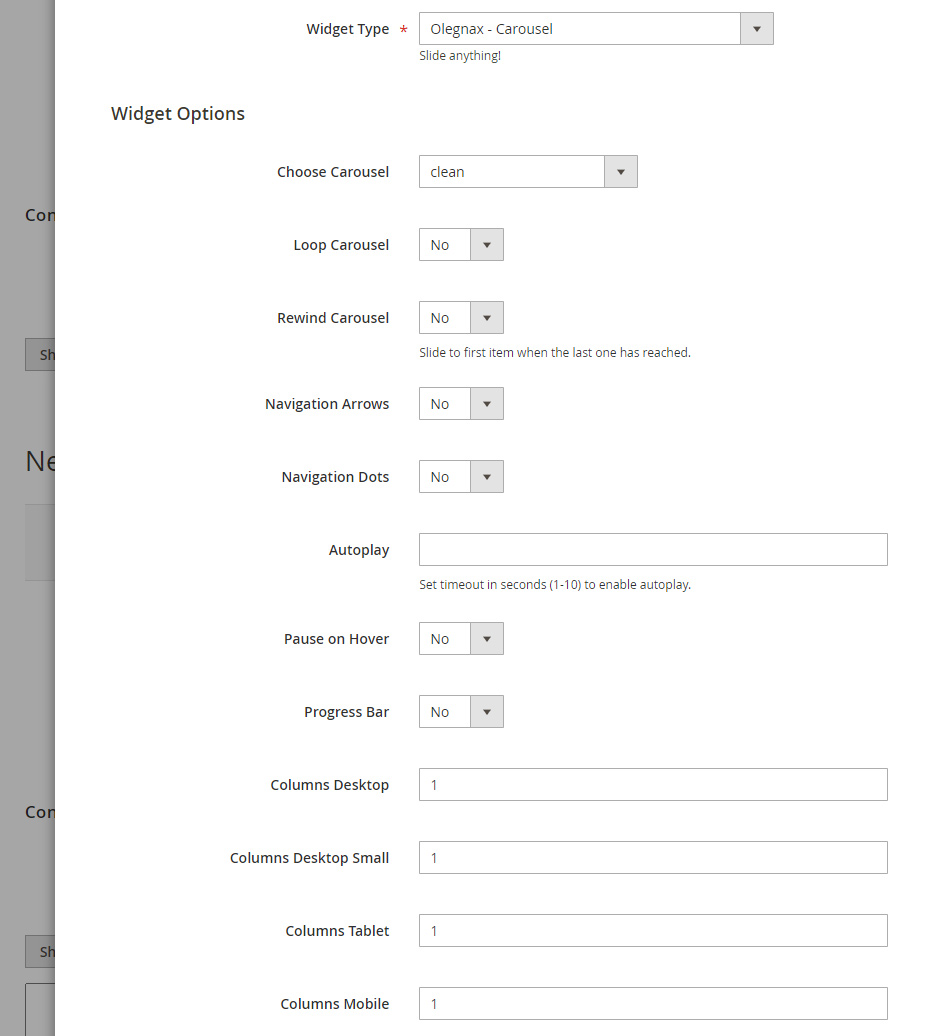
4.1 Configure Carousel Widget.
Choose Carousel - all slides should be assined to carousel(group). This is how you control what slides to show for each widget.
Loop and Rewind - with loop option enable dublicate slide created. Keep it in mind if you care about the performance. With rewind slider will scroll back to the first slide when last reached.
Navigation Dots - you have lots of controls over the slider navigation. You can show it as dots, line, text with progress bar and so on. Also you can place navigation inside or outside of the slider and adjust alignment.
Progress Bar - you can show progress line on top or bottom of the slider or in navigation. Approriate(lines) navigation style should be selected
Columns - you can choose how many slide to show at the same time for different screen resolutions.
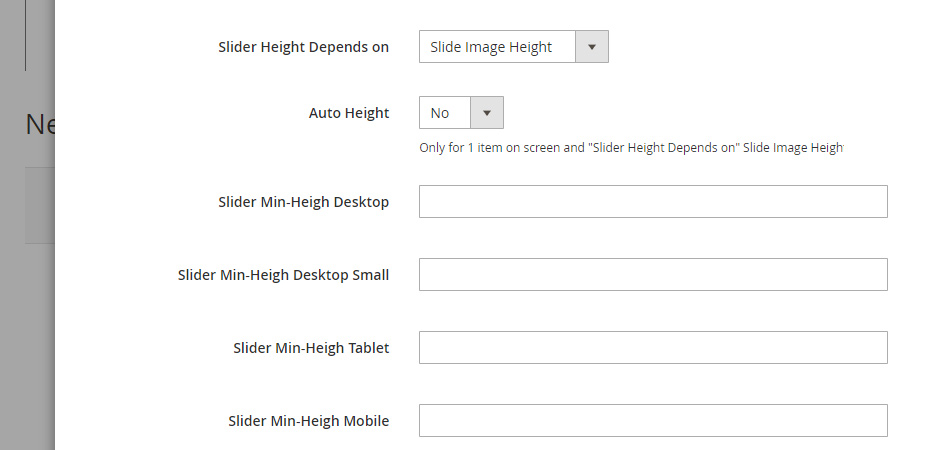
Slider Height Depends on - this is important option. You need to understand which is better for you in each situation. If you want slider to have responsive height then make it depended on image. This doesn't work for long slides because most likely its height will because smaller than the content height on some screens. So for long slides with massive content like main home page sliders, you have to set fixed height so image adapt to the slide height instead.
Auto height - you may want to enable this option if your slide height depends on image and images in each slide have different height. It will animate(adjust) slide height for each slide.
Slider Min-Heigh - required if you set "Slider Height Depends on: Slide Height Settings". You may also need to adjust your slidehow height for different screen resolutions.
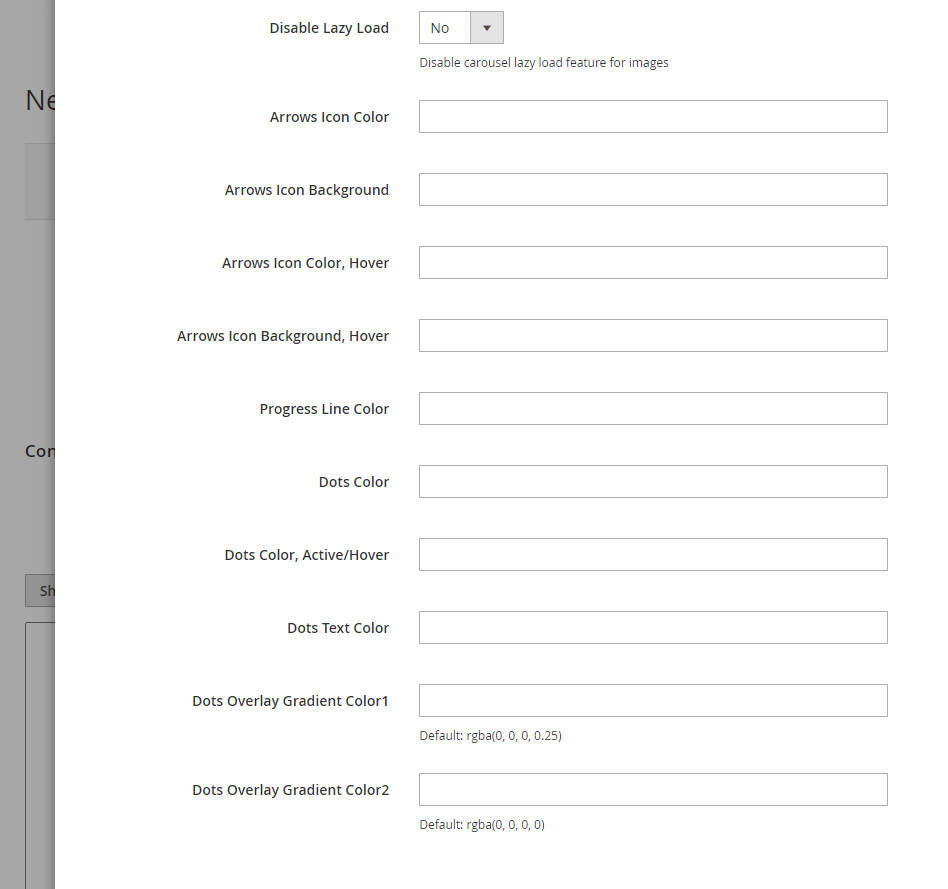
Disable Lazy Load - this option will disable theme lazy load which can be enabled in Theme Settings / General
And you can of course adjust slider navigation colors for each carousel widget.
5. Add widget outside of the content areas.
You can also add widgets via Content / Widgets.
If you want to add it below header on home page simply choose following values in widget Layout Updates block: Display > On Specied Page, Page > Home Page, Container > After Page Header .

Athlete Slideshow
To enable Athlete slideshow go to Olegnax > Slideshow > Configuration and choose Athlete Slider in Select slider. Here you can also set slider global settings on Athlete slider config block.
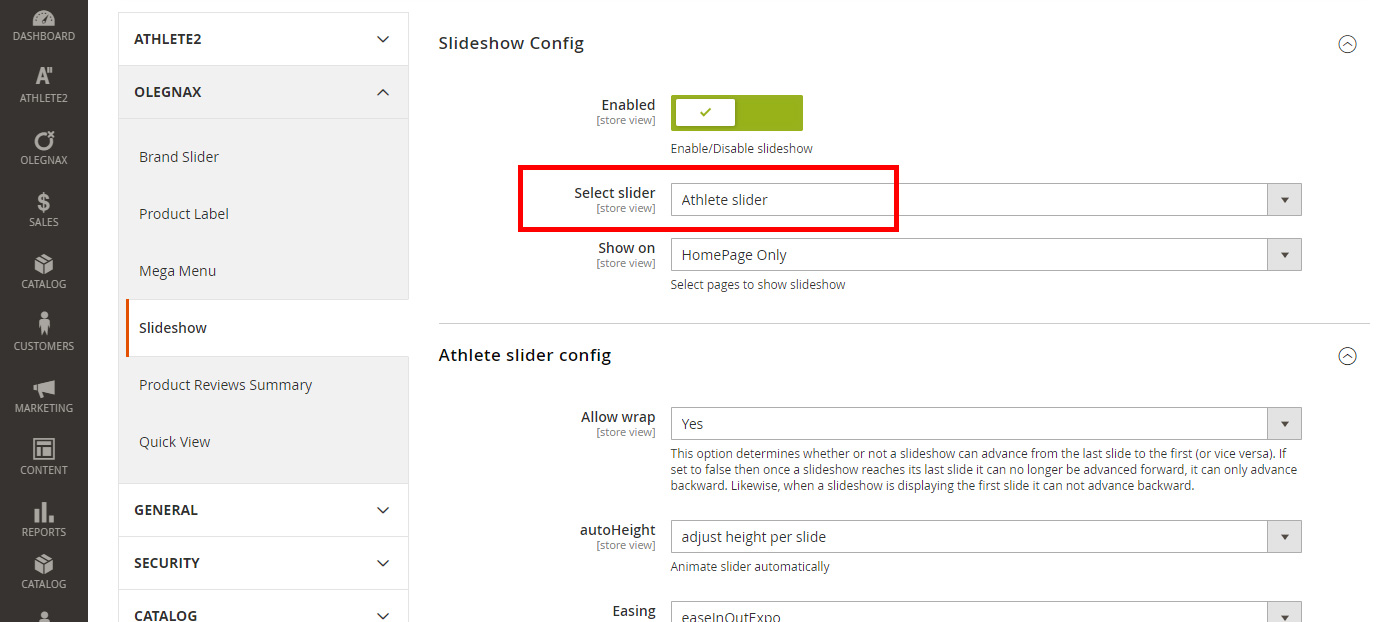
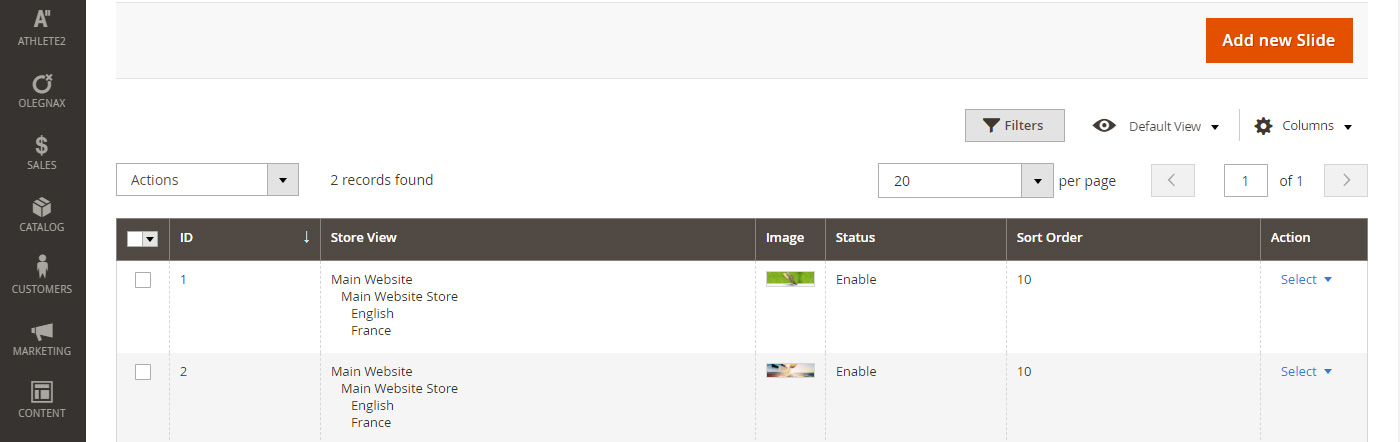
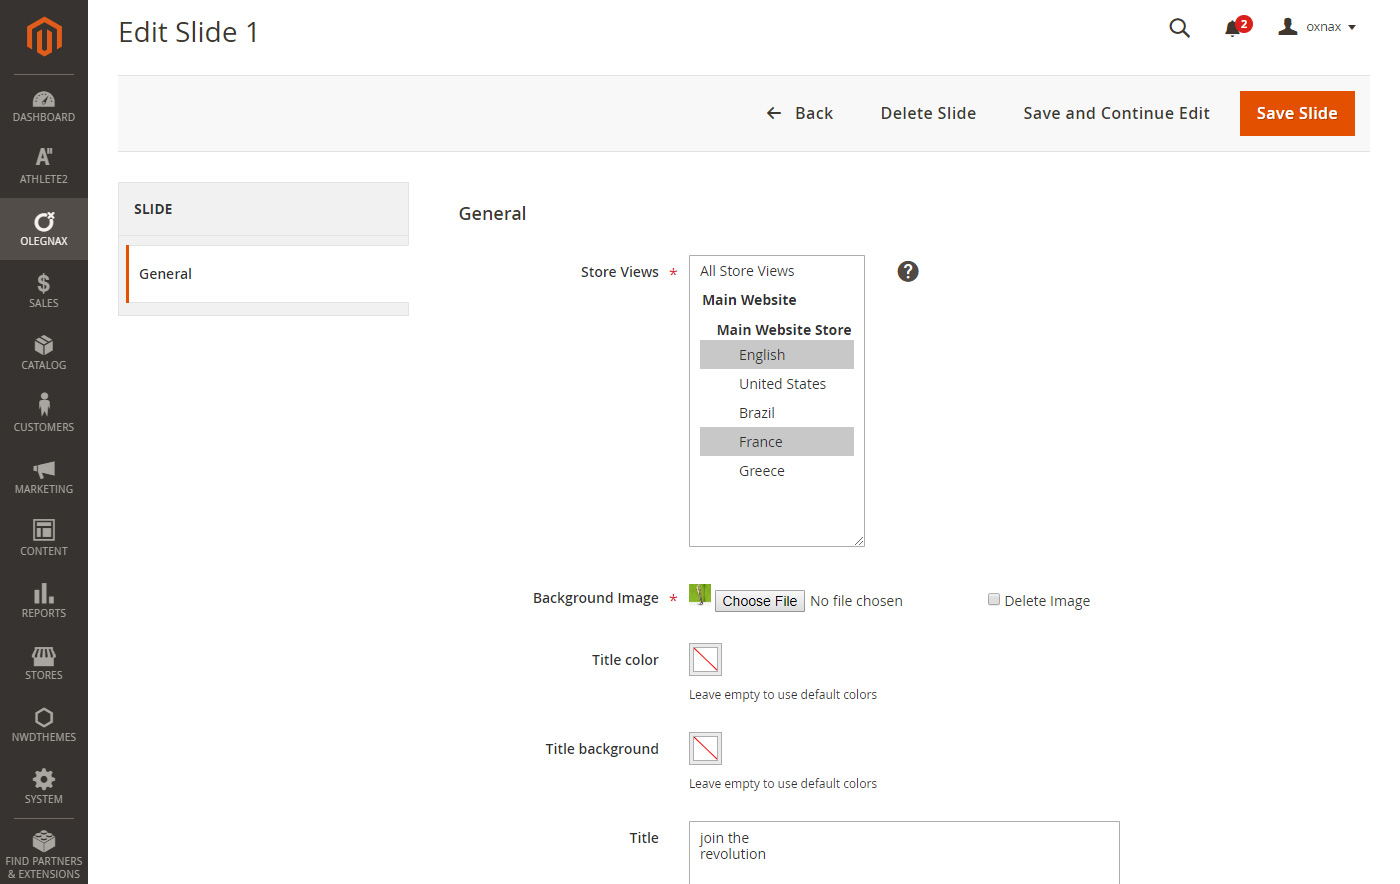
To create slides go to Olegnax > Slideshow > Slides and click Add New Slide
Note that you can only have one Athlete slideshow but you can choose on what store view to show each slide. So basically you can have one slideshow per store view.
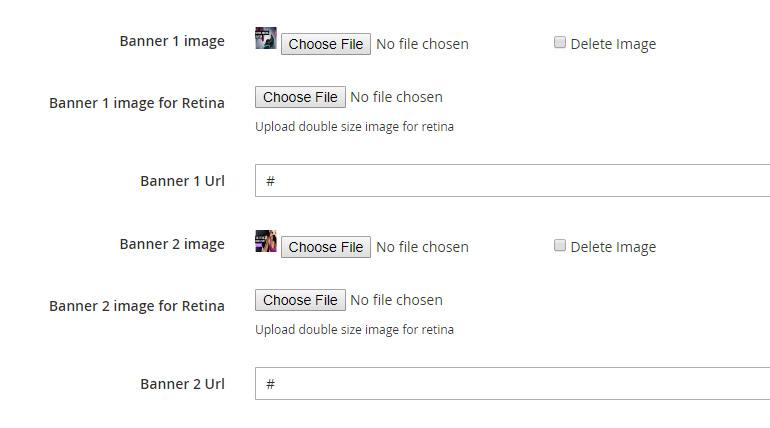
You can add Banners in slideshow which are placed one after another on the right side. You can also hide them on mobile in slideshow settings Olegnax > Slideshow > Configuration > Athlete slider config

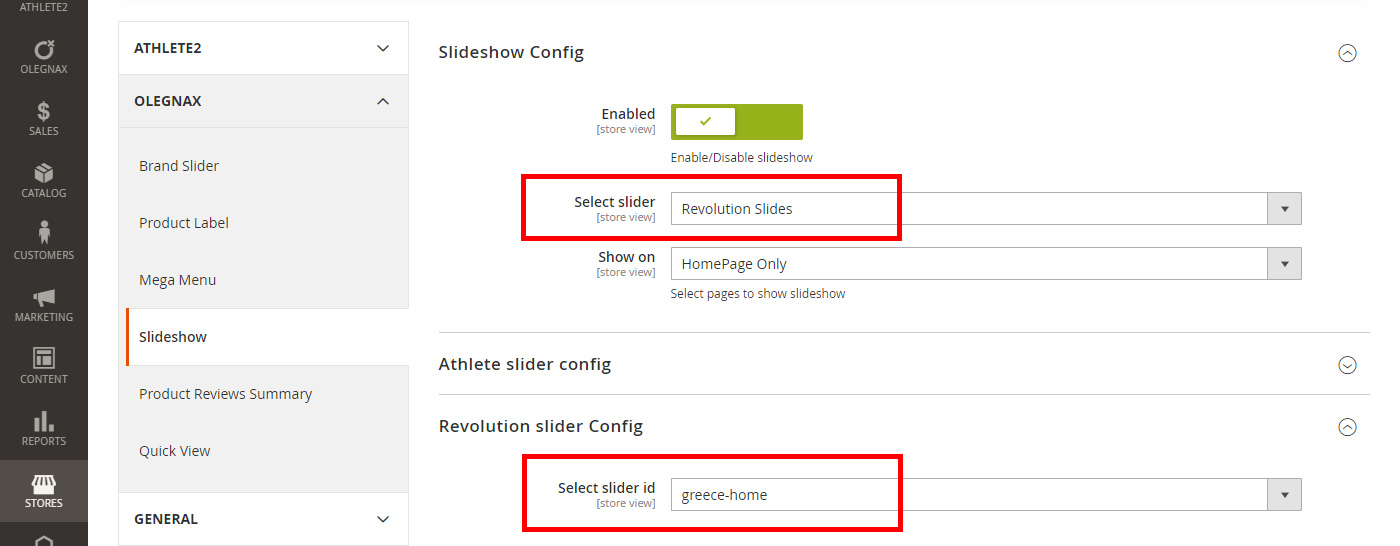
Revolution Slider
Revolution Slider is a 3rd party extension by NwdThemes, you can find its documentation on their official website.
It is bundled with the theme so you don't have to purchase it. Activation of the extension is also not required. You can find Revolution Slider extension files in Revolution Slider folder of the main archive. Follow extension official instructions to install it: How to install Revolution Slider
Our theme comes with sample slides that you can see on preview. These slides can be found in main archive Revolution Slides Import folder. How to import slides
To show Revolution slider below header you need to choose Revolution Slider in Select Slider option in Olegnax > Slideshow > Configuration. Then choose desired slider in Revolution Slider Config block.