Blog Installation
Blog functionality is based on popular, free extention by Magefan. You can find it in Blog folder of main Package or download it from Magefan official website.
Install via FTP
To install it copy blog.zip (Theme Package > Blog > blog.zip) to the root of your magento installation and unzip it unzip blog.zip. Or extract archive beforehand and upload its content to your magento folder so content of the app folder in archive goes to app folder on server.

After you've uploaded files navigate to your Magento 2 root directory in command line and run following commands:
php bin/magento setup:upgrade
php bin/magento setup:di:compile
php bin/magento setup:static-content:deploy
Install using Composer
You can also install this extension using command line only, without uploading files. To do this navigate to your Magento 2 root directory in command line and run following command:
composer require magefan/module-blog
This method however will require Magento Marketplace authentication keys.
After you've installed blog run following commands:
php bin/magento setup:upgrade
php bin/magento setup:di:compile
php bin/magento setup:static-content:deploy
Please note
If you'll install blog via ftp and composer at the same time you will get an error because composer will install it in different location. So you'll have too blog installations. To fix it remove one of the blog installations either from vendor(installed using composer) or app(manually installed) folder.
Blog Settings
Blog settings are in two locations.
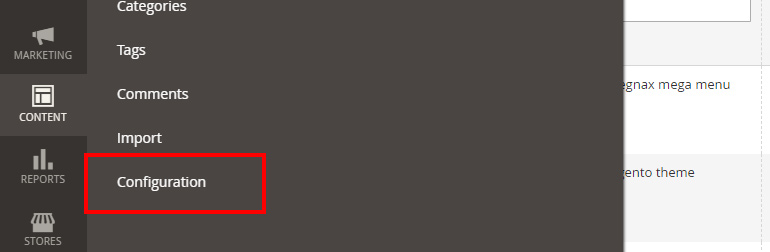
Extention general settings can be found in Content > Blog > Configuration or Store > Configuration > Magefan Extensions.
AdditionalSettings
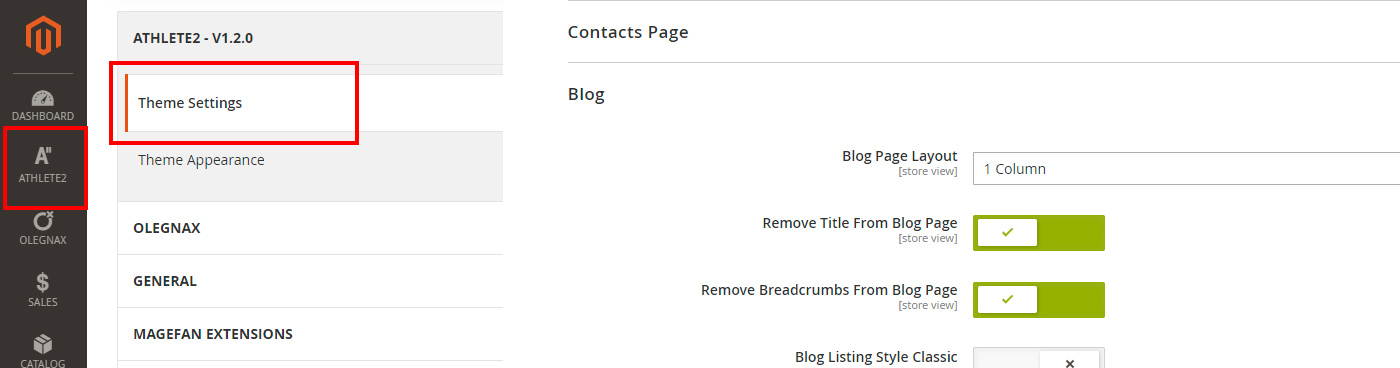
We've extended blog functionality and added additional settings which can be found in Athlete2 > Theme Settings
Detailed explanation of this options can be found below.
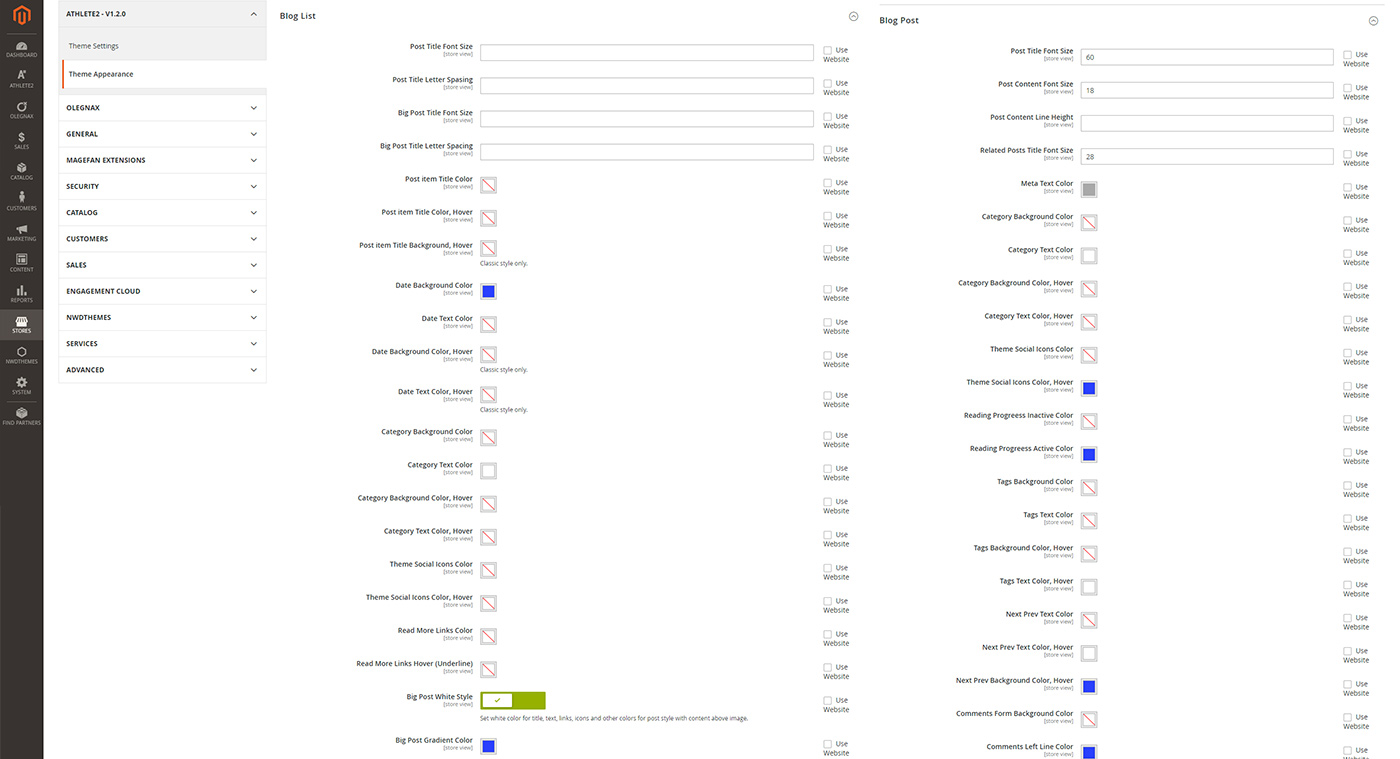
Blog Colors
Blog Colors and font settings can be set in
Athlete2 > Theme Appearanace > Blog List and
Blog Post sections.
Blog Page
Page Layout / Sidebar
You can easily change blog, search result and archive pages layout in Athlete2 > Theme Settings > Blog: Blog page layout. Also you can remove breadcrumbs and title from page here. Below you can see examples of a page with sidebar and title and 1 column page without page title.

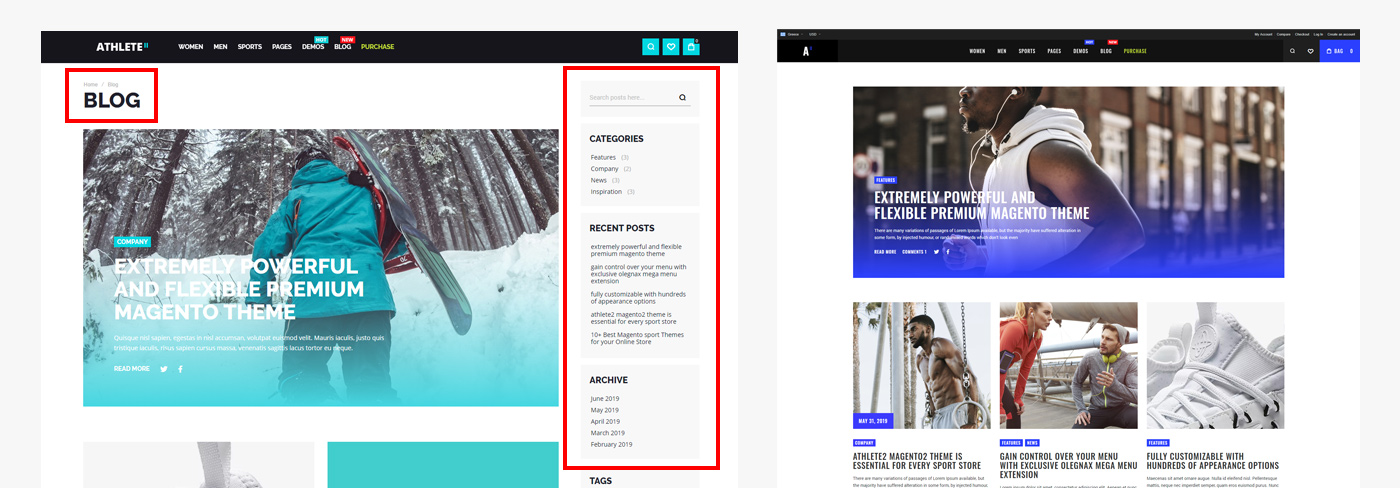
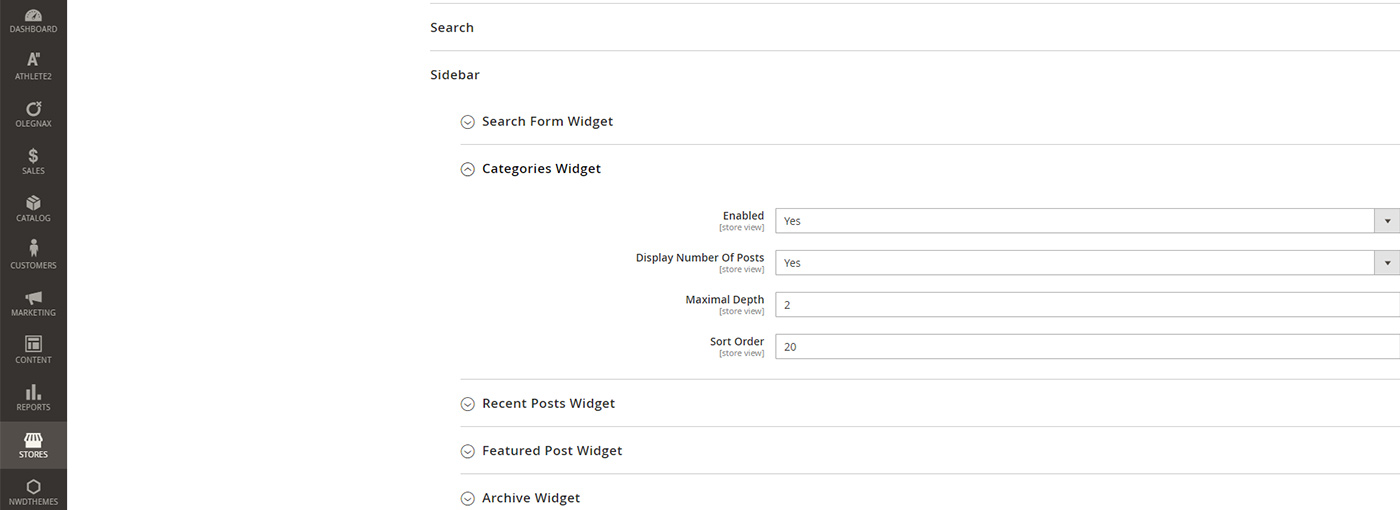
Sidebar blocks can be changed in blog extension settings Content > Blog > Configurationor Store > Configuration > Magefan Extensions. This is where you can enable/disable, reorder each block and adjust their settings.
Category page layout can be changed in category settings Content > Categories.
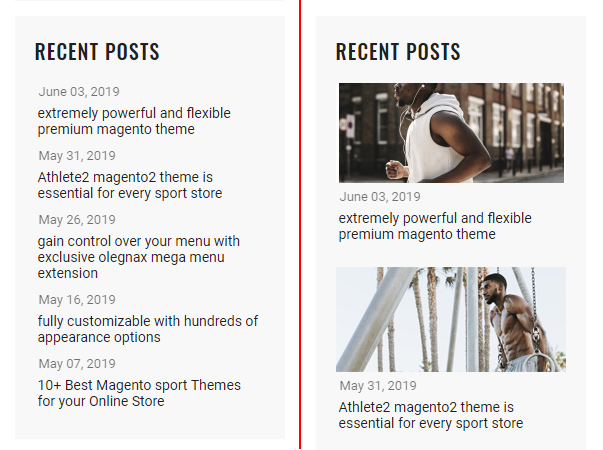
You can show or disable image for Recent posts block in sidebar and also set its size. Theme Settings / Blog / Blog Sidebar Recent posts Show Image

Blog listing Style and Columns
You can set from 1 to 3 posts per row on blog listing in Athlete2 > Theme Options > Blog and also choose whether to use classic or default(modern) blog style.
Please note that columns affect only items with image above the content.
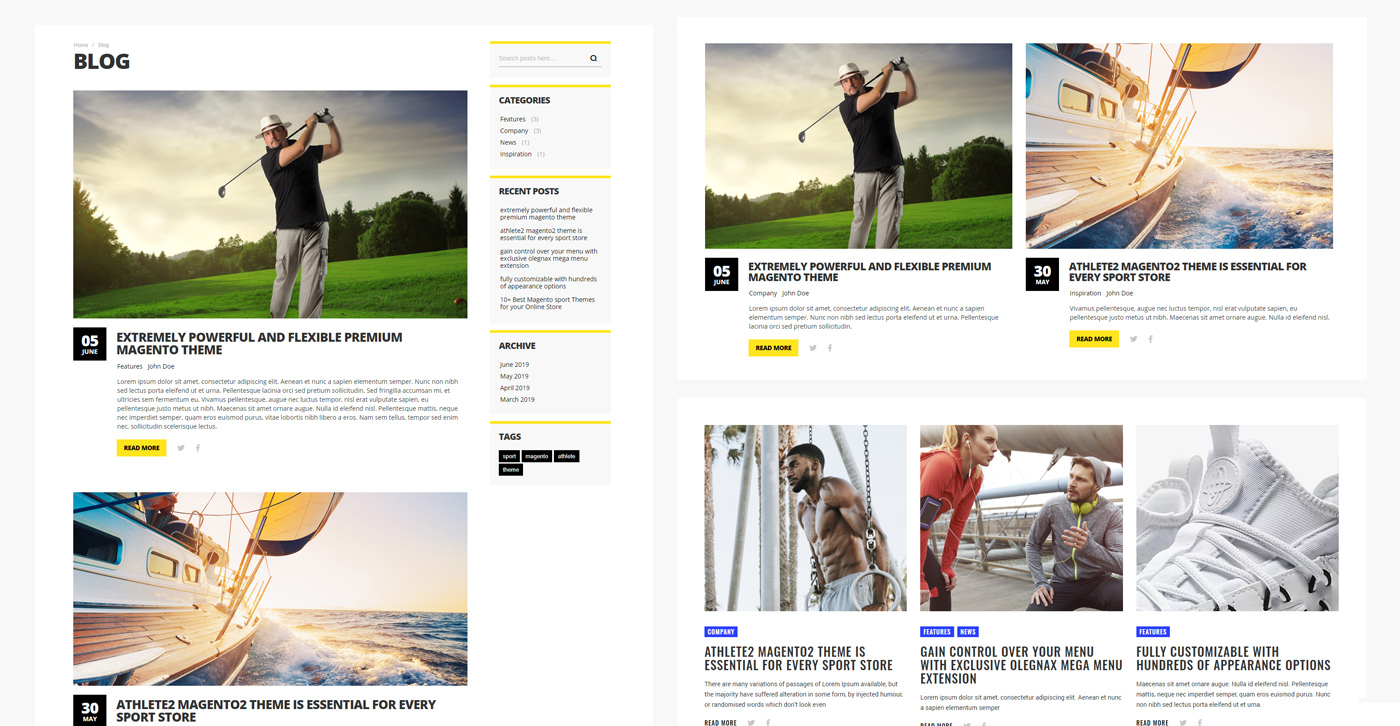
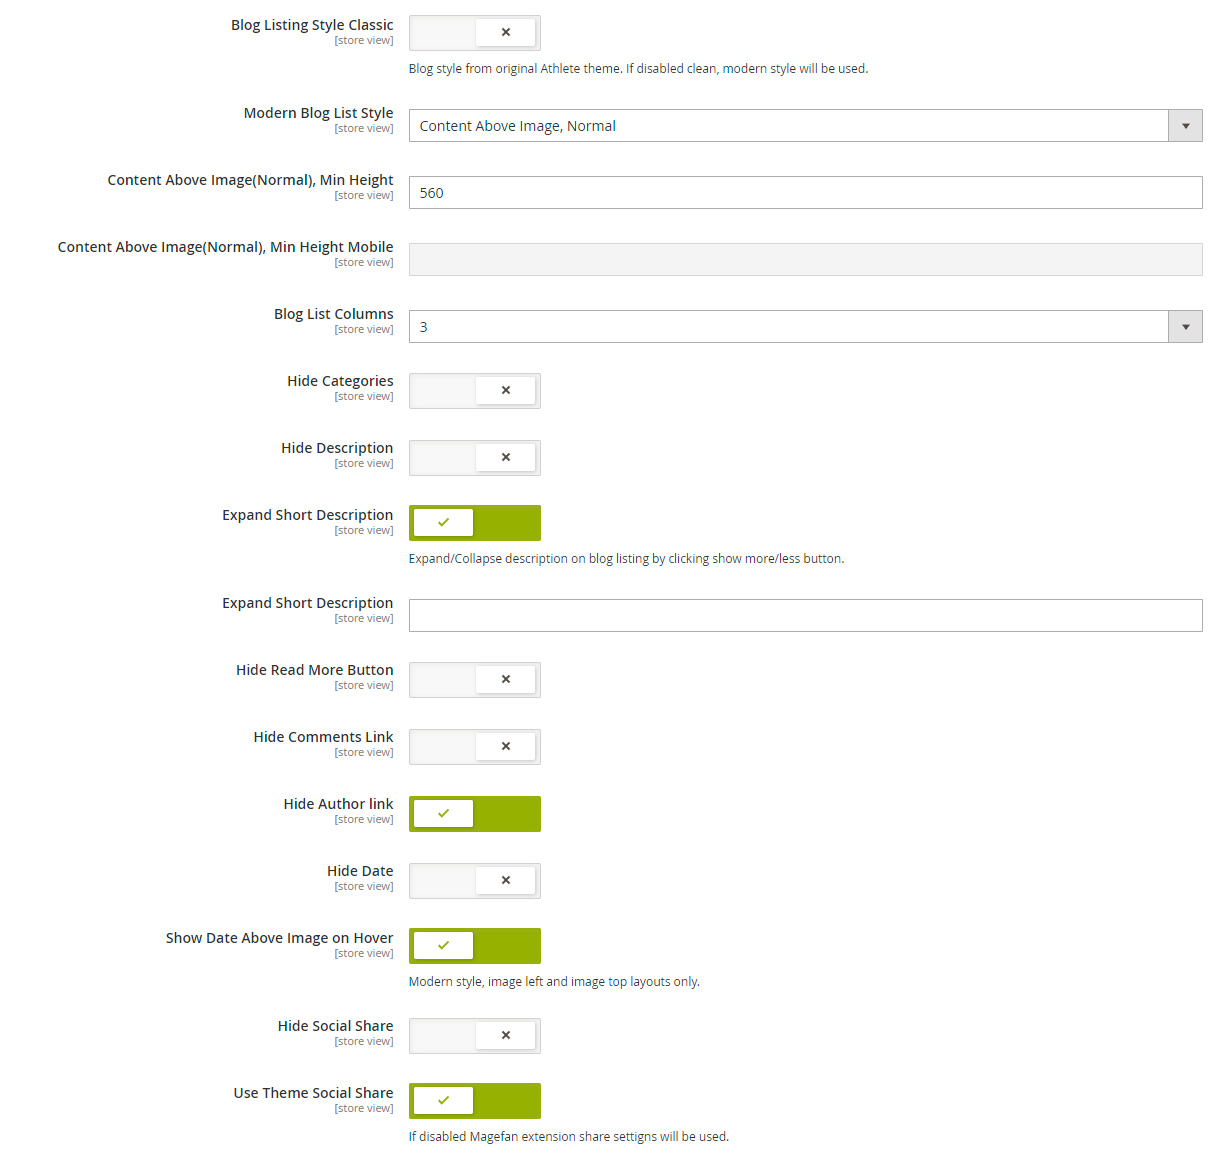
Additionally you can show/hide each element on blog listing like categories, date, author, etc.
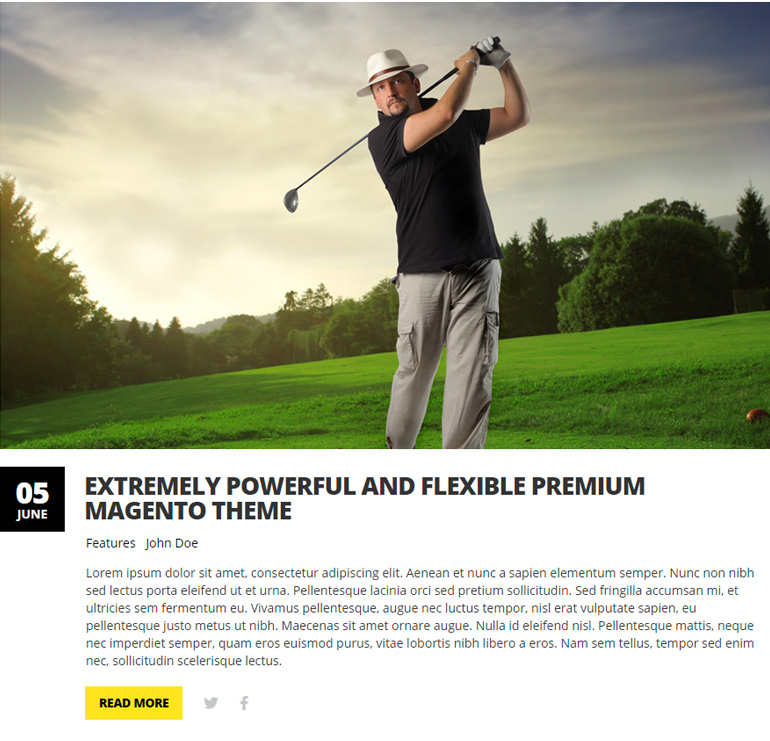
Classic Style
"Classic" is how blog looked in Athlete 1 version. Check it below.
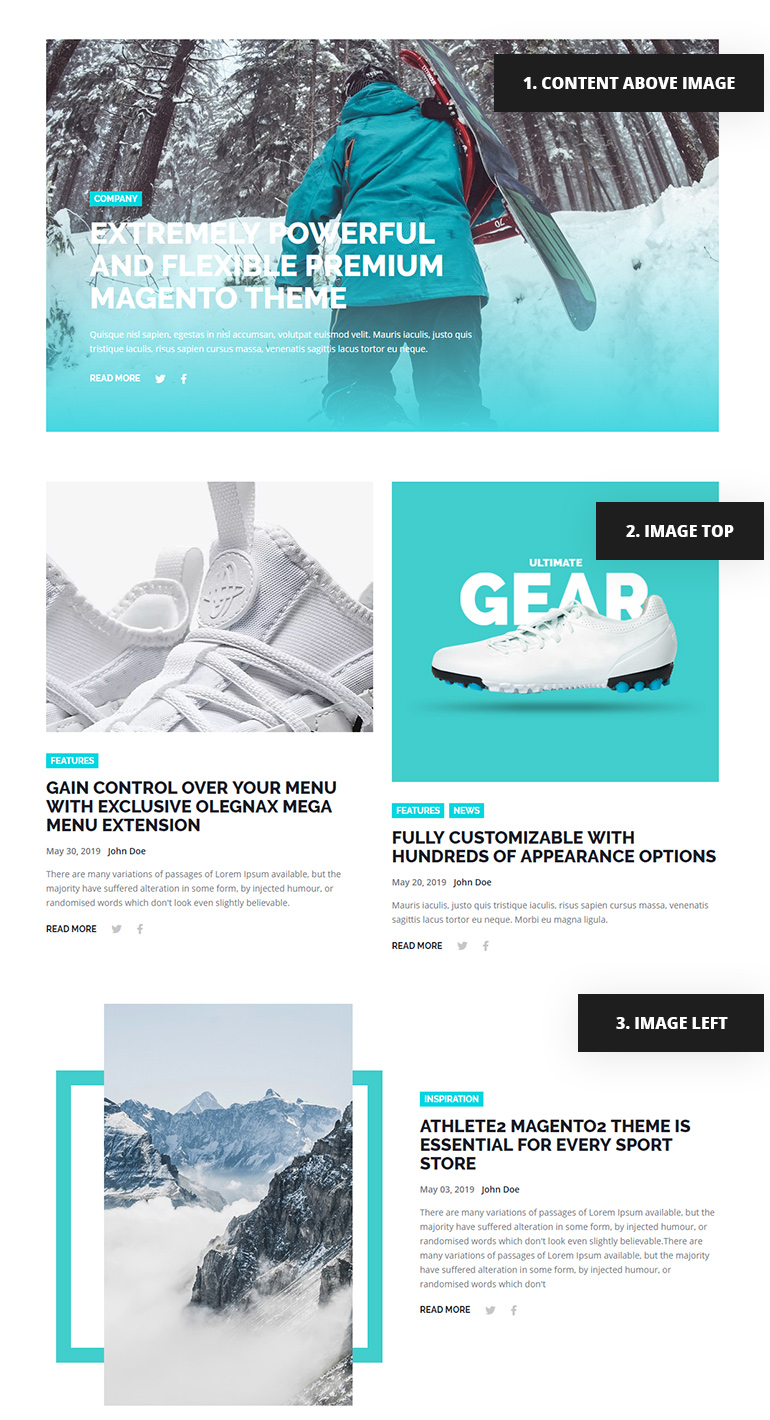
Modern Style
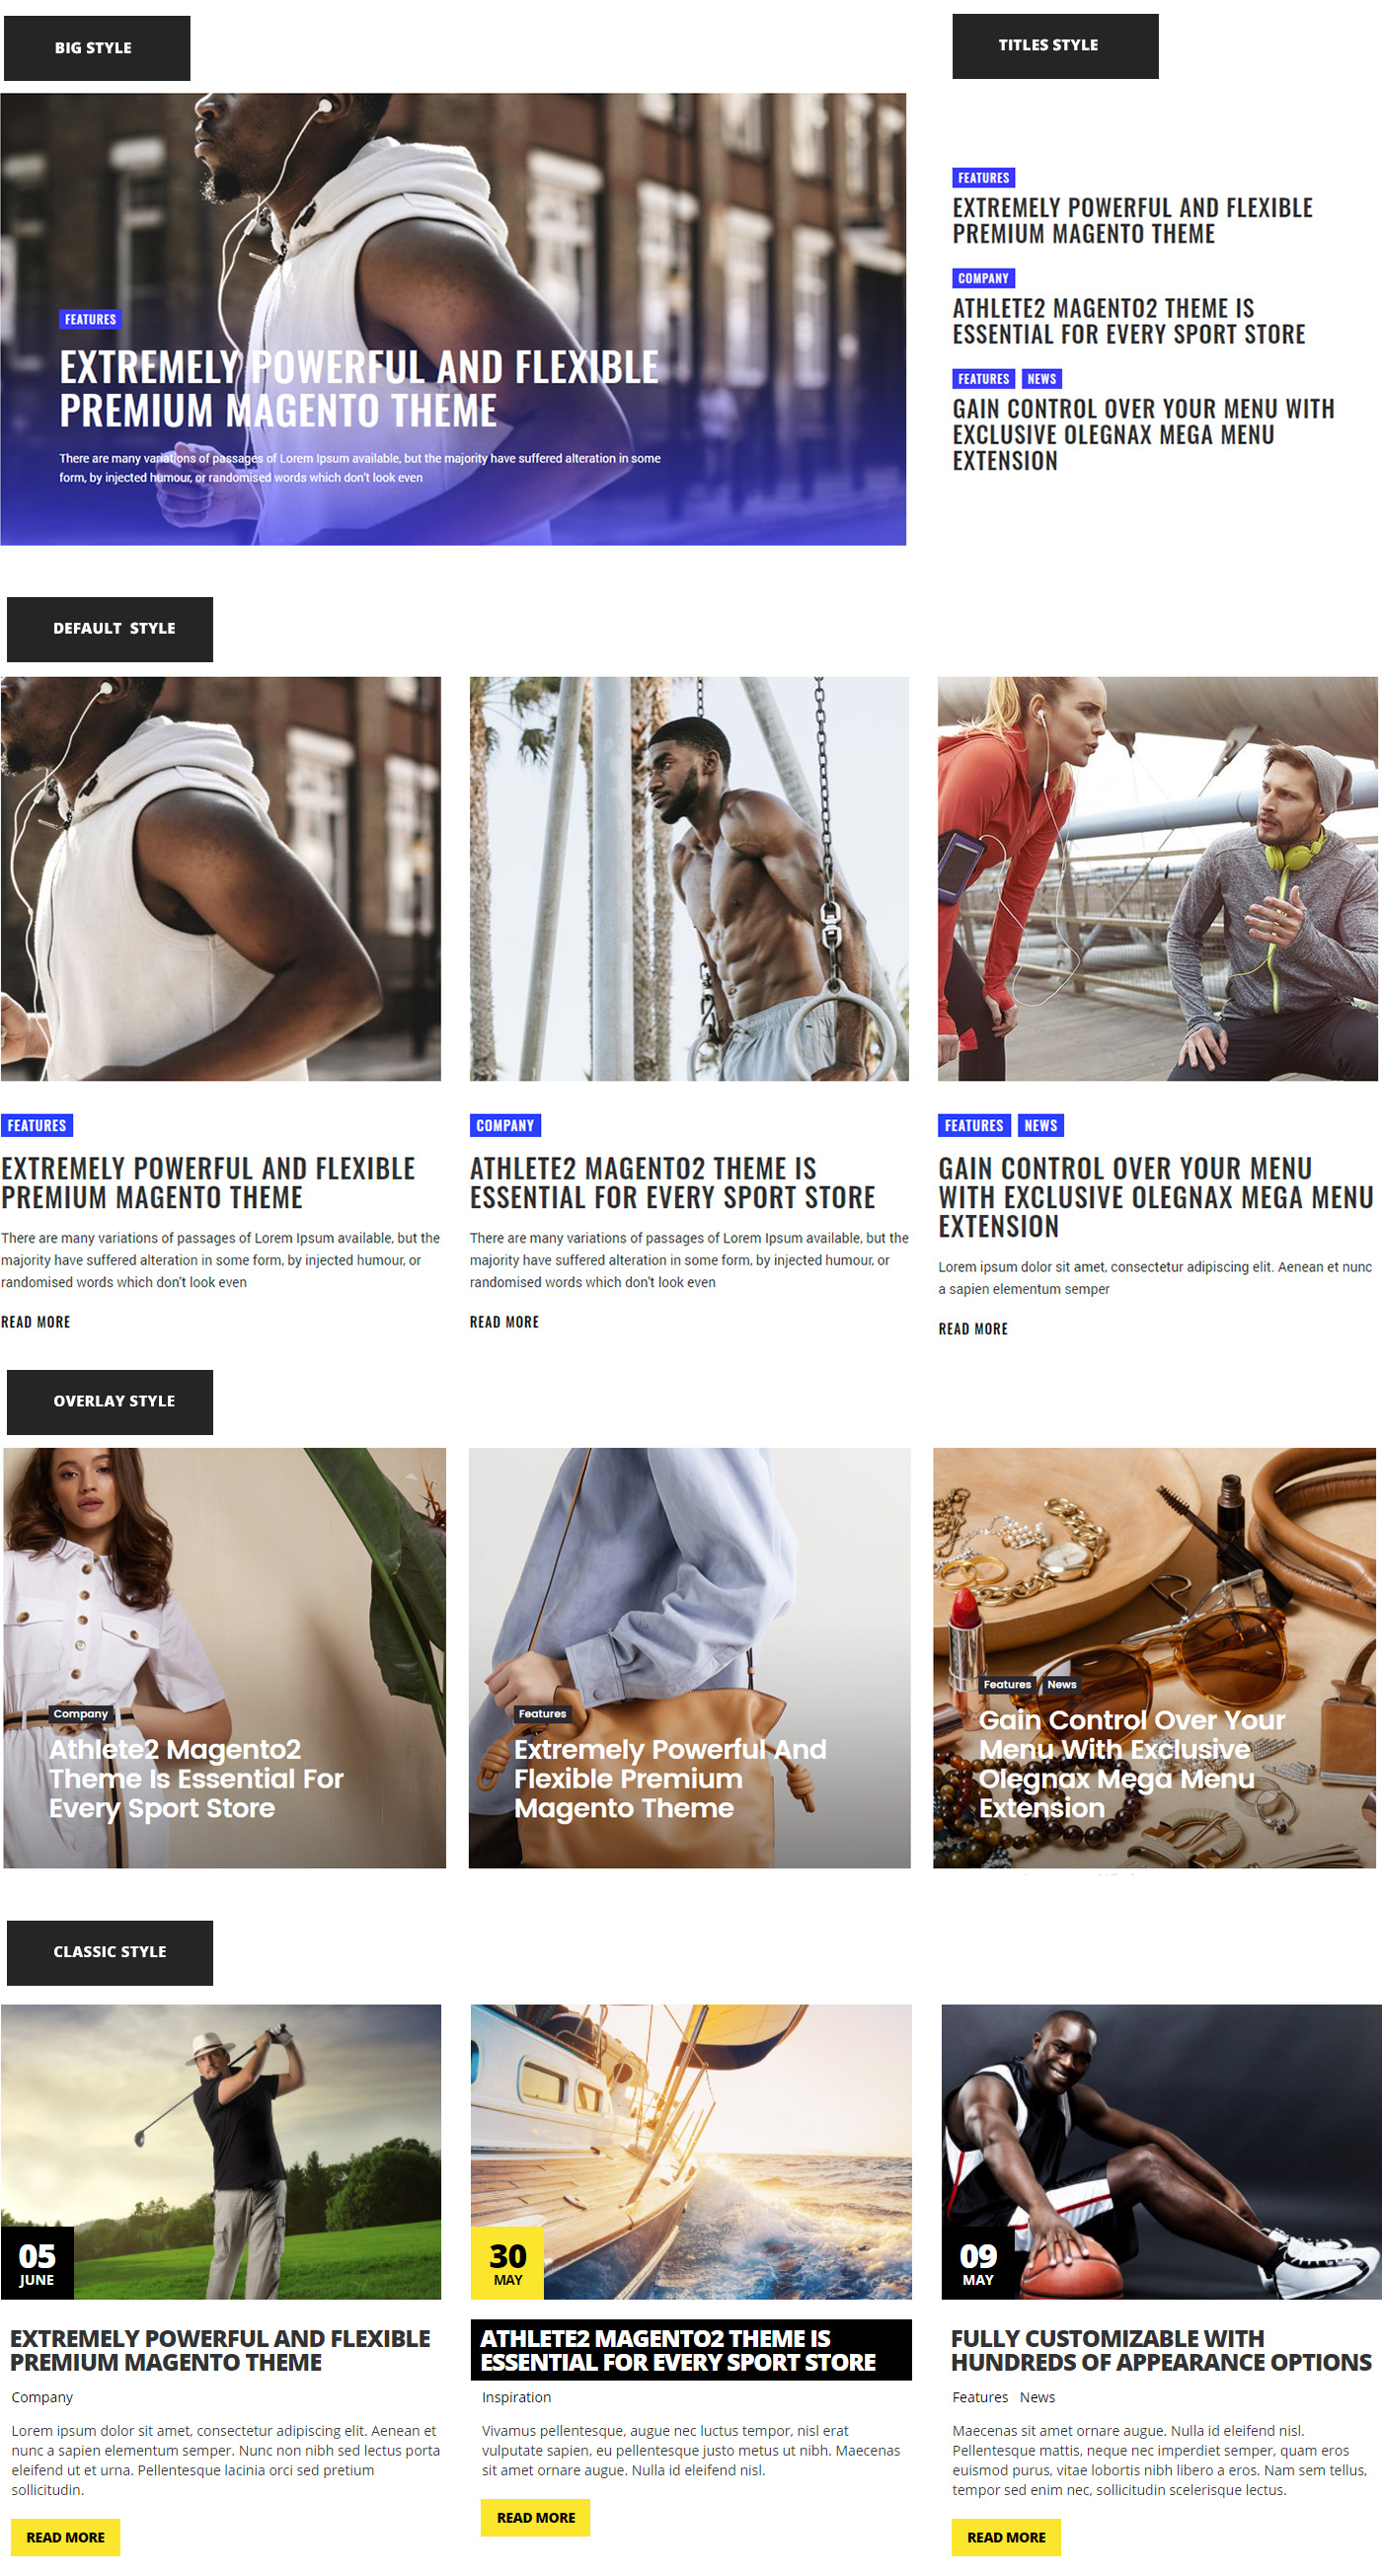
Default(modern) style comes with 3 additional blog styles: Image top, Image left and Content above Image. When Classic style enabled these options are not avaiable.
You can choose default style for all posts in theme options but also you can choose different style for each post. This allows you to create unique layouts. This is how layout below was made. Default style was set as Image left, but first 3 posts has their own style settings content above image and image top accordingly.
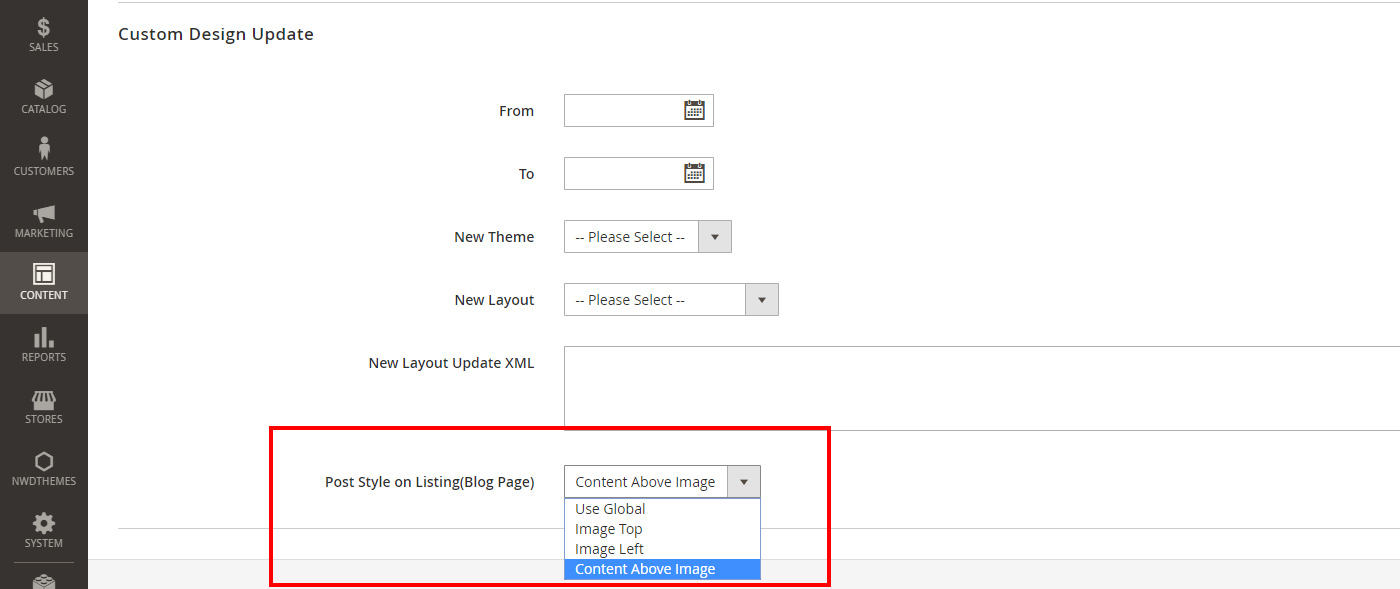
To change style for specific post, open post editing page and scroll down to Custom Design Update secton. Here you can find Post Style on Listing option.
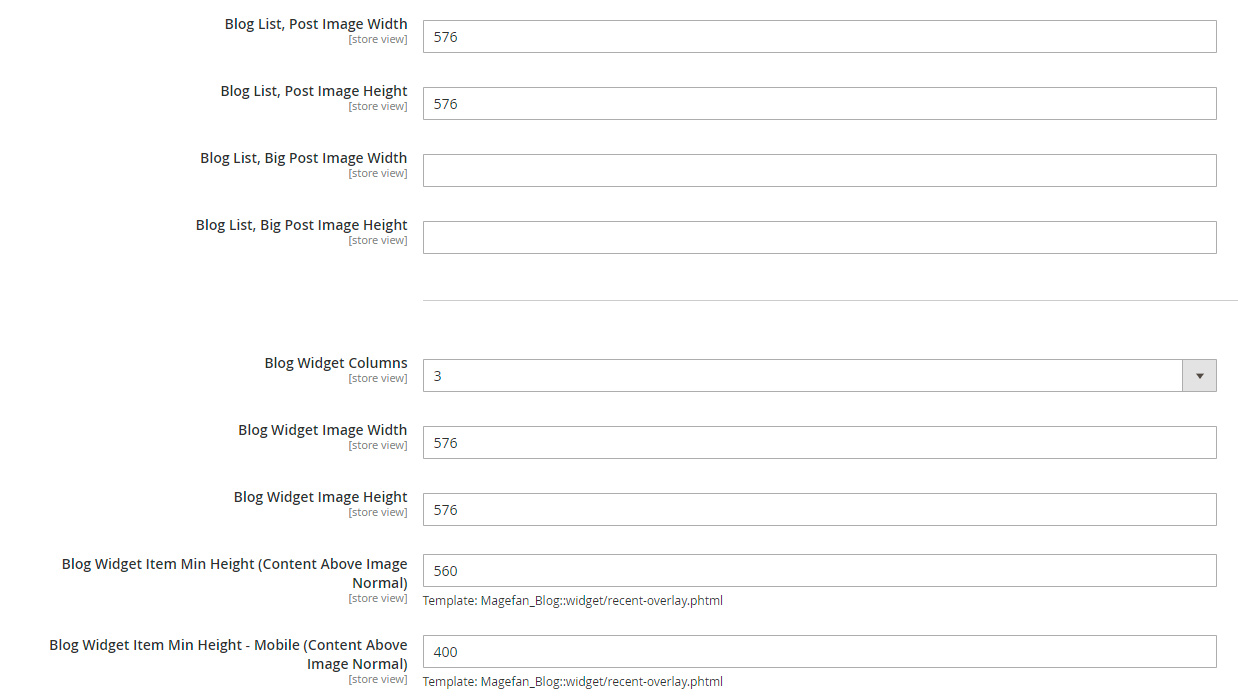
Content Above Image(Normal), Min Height, Content Above Image(Normal), Min Height Mobile these settings are for Content Above Image, Normal blog list style. Image is on backround in this layout so we need to set height manualy for blog listing items. We can do this for desktop and mobile. See example below.

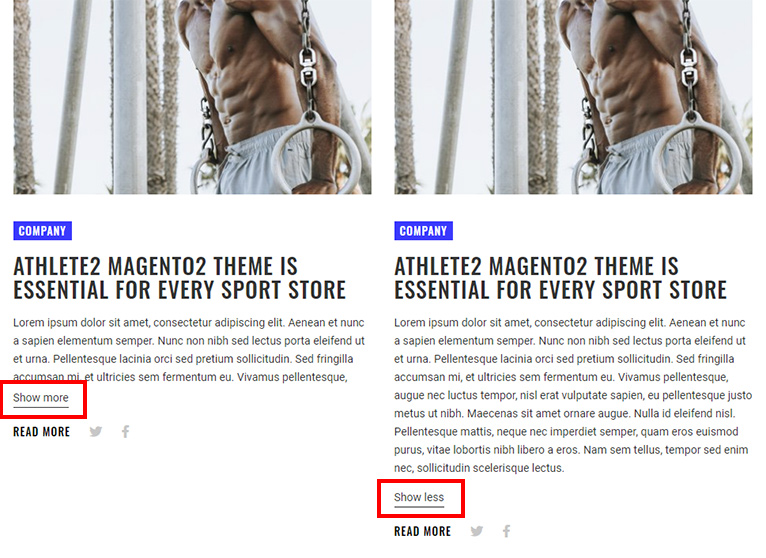
Expand Short Description - You can set max height with expand option for blog posts short description on listing if you want to put long content there. It will add "show more/less" link and set max height which you also you also set in settings: Short Description Max Height.
Blog Images Size
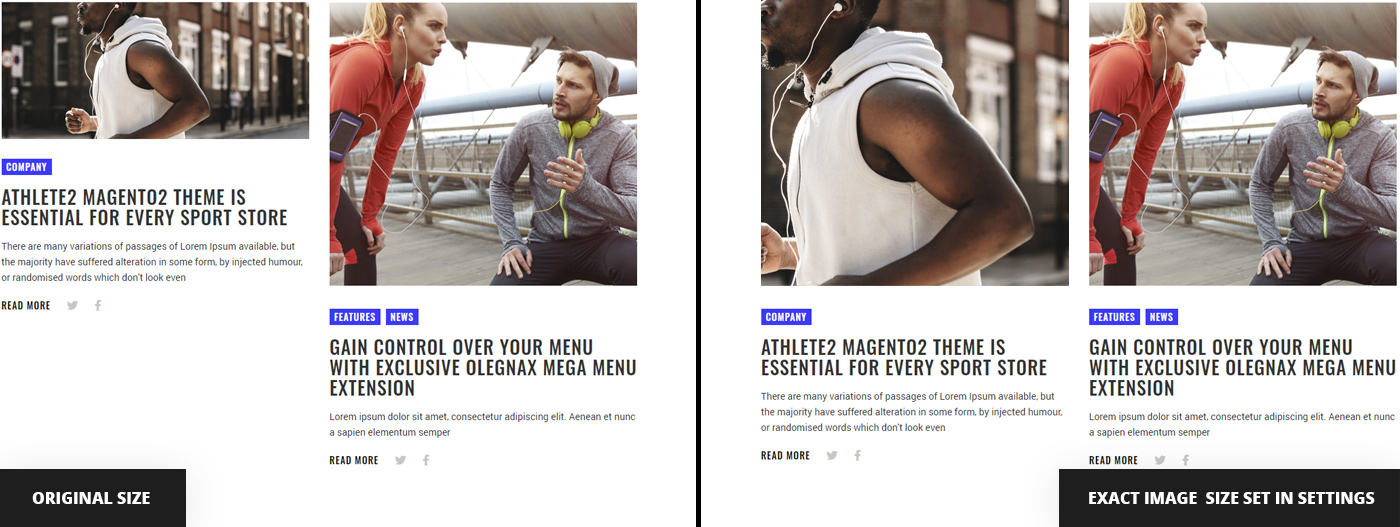
By default images on blog listing has original size. So if you want to use the same featured image for post and listing then your visitors will have to load big image on listing even though they will see it much smaller. In this case it is better to crop images in blog listing to descrease website loading time for your customers. You can do this in Athlete2 > Theme Settings > Blog. You can set image size for different post style. Content Above Image, Normal - it is when content above image and it repsect grid columns settings. Big posts is also when content is above image but itis always in one column(full content width).
Blog widgets image size
Image size can also be set for for blog widgets in Athlete2 > Theme Settings > Blog. This is useful when you have various post styles on listing. You can see example of how widget will look when you use mixed post styles on listing. To fix this "jump" of the image you can set image size for widgets. In this case wide images will be cropped and posts will look neatly aligned.
Blog widgets styles
Our theme comes with 3 widget layout templates. Default (Image top, content bottom), Big(Content overlay image, always 1 column), Overlay(Content overlay image) and Titles (and categories) only. Additionaly magefan comes with masonry blog widget style.
Please note that Classic Style option for blog listing will also affect the look of default widget.
You can check examples of blog widget styles on this pages: Blog Widgets
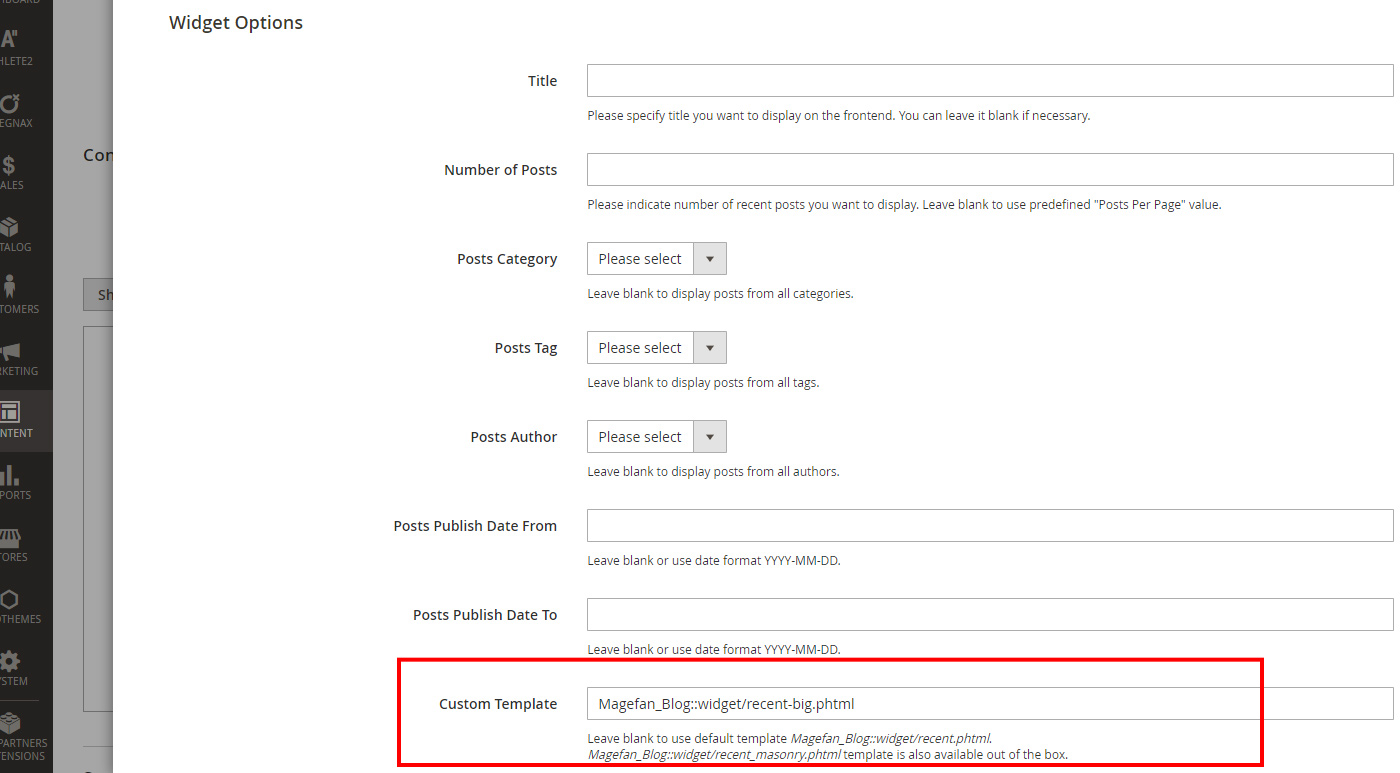
To add Blog widget click Insert Widget button in page editor and choose Recent Blog Posts or Featured Blog Posts.
Now to change widget tempalte you need to add one of the following lines to Custom Template field:
Magefan_Blog::widget/recent-big.phtml
Magefan_Blog::widget/recent-titles.phtml
Magefan_Blog::widget/recent_masonry.phtml
Magefan_Blog::widget/recent-overlay.phtml
Leave it empty for default style.
Posts per page and infinite scroll
Magefan blog has default pagination option in Content > Blog > Configuration > Post List. You can set length of short post description, amount of posts per page and paginations.
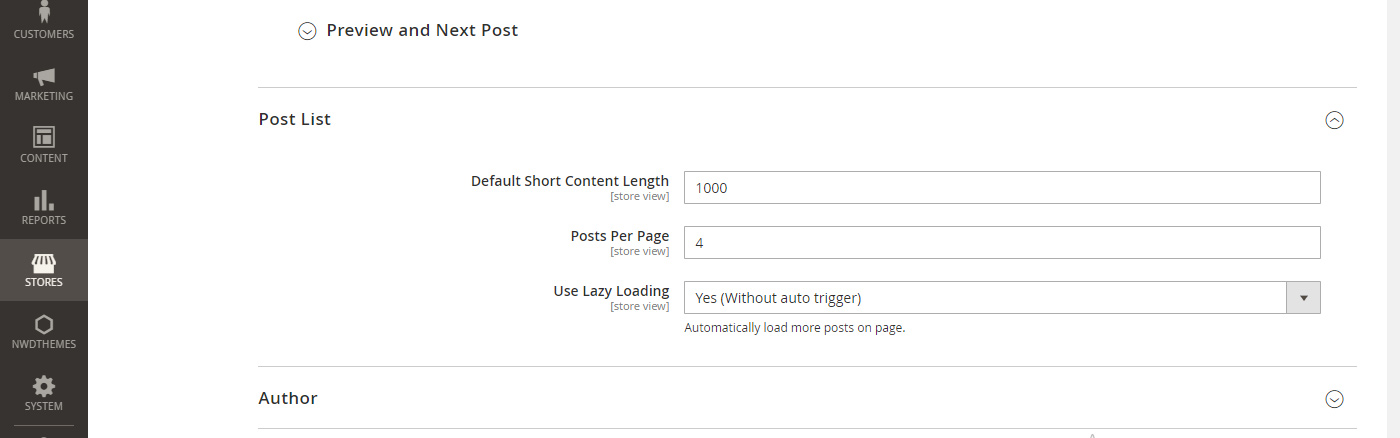
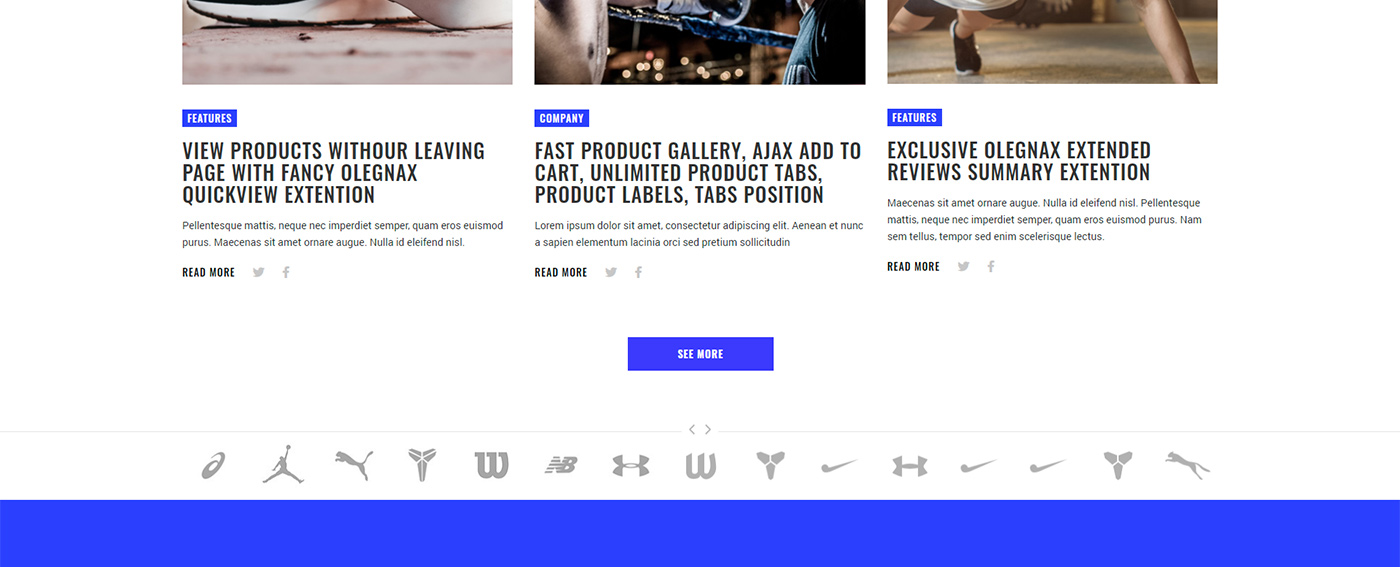
Use Lazy Loading options allows you to replace pagination with ajax and load posts without reloading the page. You can choose with (posts will be loaded when you scroll down) or without autotrigger (posts will be loaded when you click "see more" button, see image below).
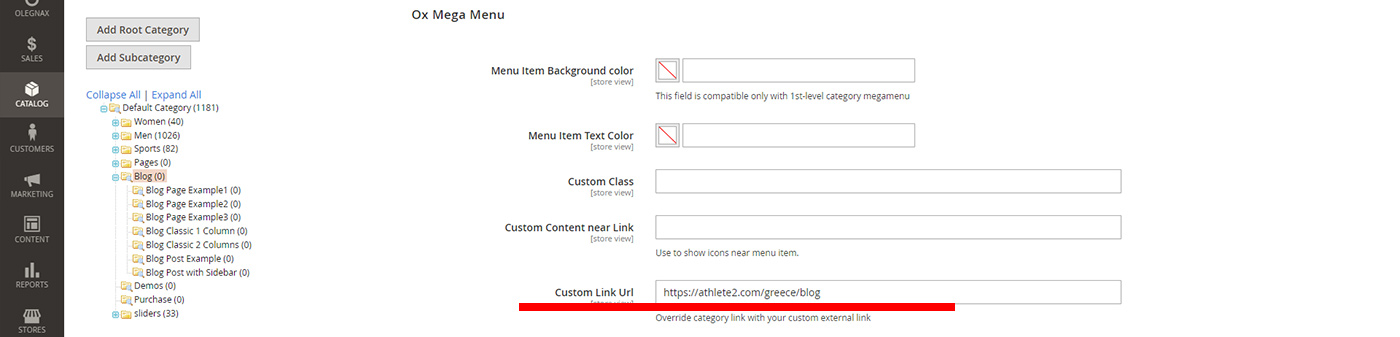
Magefan blog has default option to add blog link in menu in Content > Blog > Configuration > Category Top Navigation. But we suggest to use Olegnax Mega Menu custom link to add new menu item. Because when you add link with blog extension it doesn't have additional menu classes and data that we add with mega menu so appearance may vary or get broken.
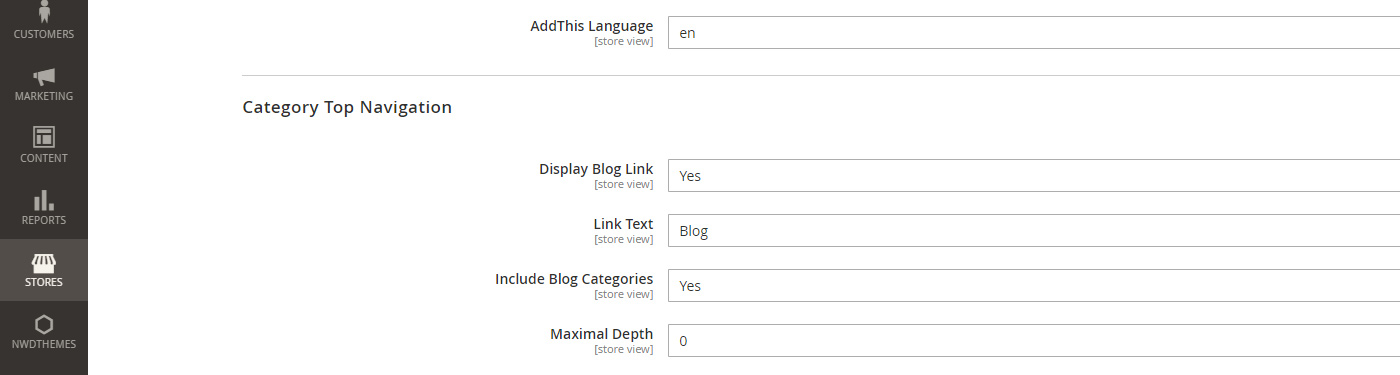
To add new link in menu simply create new category and set Custom Link Url option in Ox Mega Menu section with link to your blog page. By default it is http://YOURWEBSITE.COM/blog.
Check Mega Menu section for more details about mega menu.
Blog Post
To create or edit post navigate to Content > Blog > Posts
Post Featured Image and Short content.
Featured image can be set on post editing page in Display Settings section.
By default featured image used for blog listing thumbnail and also shown in post content. We recommend to use featured image for listing only and add another (different size) image directly in post content like we did on our preview. You can remove featured image from blog post in Athlete2 > Theme Options > Blog Post: Hide Featured Image in Post.

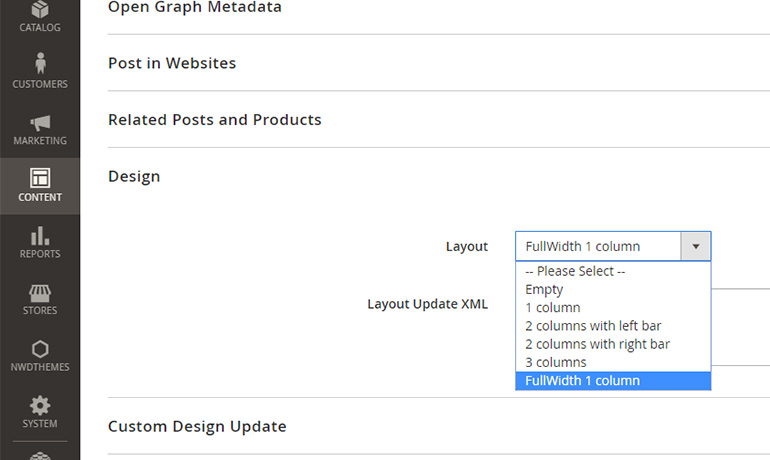
Post Page Layout
You can choose post layout in Desing section of post editing page. This option isn't post specific but global. So there can be layouts that doesn't work well with the posts. In our theme you can use 1 column, 1 column fullwidth, and 2 columns layouts.
Narrow Content Style
Classes: narrow-content, wide.
You can set limited width (830px) to content by enabling narrow post style in theme options Athlet2 > Theme Options > Blog Post.
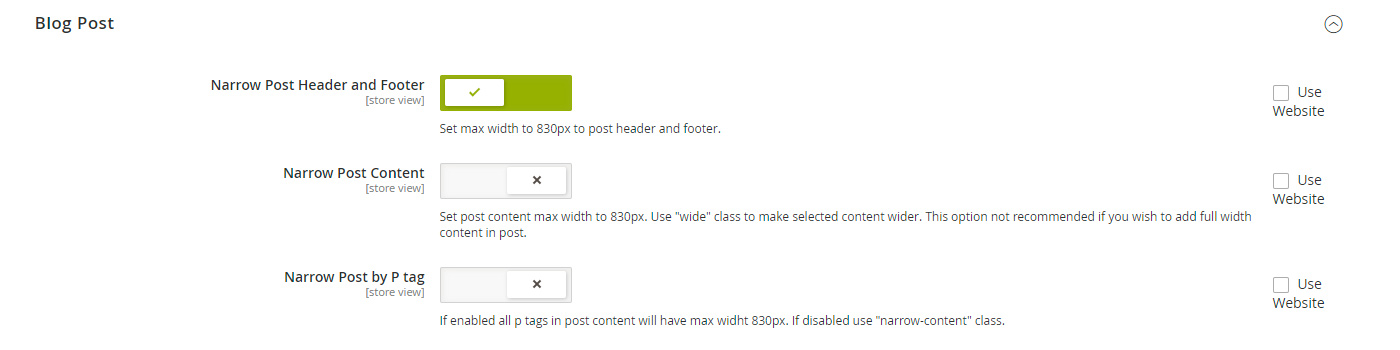
Narrow post Header and Footer option will what it says, content of the post will not be affected. This is the only option you needd if you want to have full width elements in content. Like 4 images in two columns in this sample post.
In this case you can wrap content parts that you want to be narrow in narrow-content classs. Like this:
<div class="narrow-content"> ... your content ... </div>
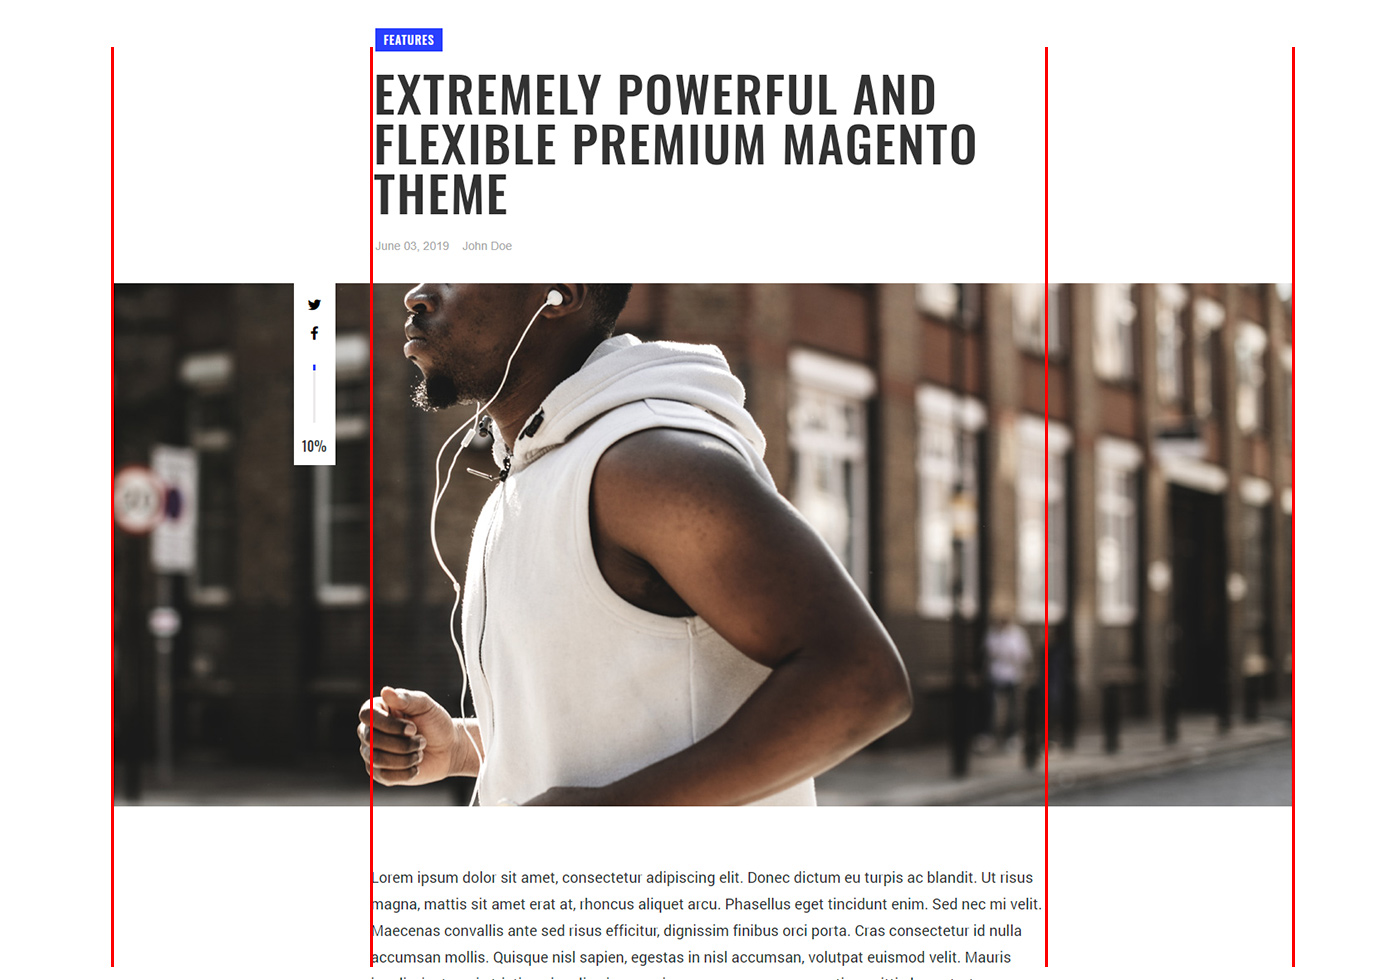
You can see on image below that text width is smaller that image. This is because it is wrapper in narrow-content classs. Additionally image wrapped in container class to limit its width to website width because we use full width layout for post on our preview. So basically you have two limiters: container(your website width, in our case it is 1460px) and narrow-content (830px) class.
Narrow Post Content options will make the whole content wrapper narrow. Enable this option if you want your content to be narrow mostly. To make some part of the content wider with this option enabled use class wide.
<div class="wide"> ... place wider content here ... </div>
Narrow Post by P tag will make your life easier by making all p tags in your content narrow so you don't need to add narrow-content class every time. Simply wrap content that you wan to be narrow in p tag:
<p> ... your content here... </p>
Don't forget to disable Narrow Post Content option in this case. And again, to make some parts of the content wider use class wide
Content Sample Code
Below you can find content of the this sample post on our preview. We use 1 column fullwidth layout for this post and Narrow Post Content and Narrow Post by P tag options disabled.
What you can see here is that we use spacers <div class="spacer-regular"> </div> to add space between content blocks.
We use container classes because we set full width post layout to make one of the blocks (with images) full width. But we want other part of the content to be maximum as website width or narrow so we wrap it in container. The part where we want content to be full width is wrapped in container-fluid class for paddings. So basically we use Bootsrap grid classes and narrow-content class.
<div class="container"><div class="a-center"><img src="{{media url="magefan_blog/blog-big-01-f.jpg"}}" alt="" /></div>
<div class="spacer-regular"> </div>
<div class="narrow-content"><p>Lorem ipsum dolor sit amet, consectetur adipiscing elit. Donec dictum eu turpis ac blandit. Ut risus magna, mattis sit amet erat at, rhoncus aliquet arcu. Phasellus eget tincidunt enim. Sed nec mi velit. Maecenas convallis ante sed risus efficitur, dignissim finibus orci porta. Cras consectetur id nulla accumsan mollis. Quisque nisl sapien, egestas in nisl accumsan, volutpat euismod velit. Mauris iaculis, justo quis tristique iaculis, risus sapien cursus massa, venenatis sagittis lacus tortor eu neque. Morbi eu magna ligula. Nunc efficitur ut est at finibus. Etiam id dui egestas, semper dolor at, facilisis urna. Praesent efficitur velit et turpis venenatis auctor. Phasellus justo ex, finibus pellentesque condimentum maximus, interdum eget leo. Morbi egestas, nibh vitae luctus posuere, lorem libero ornare ante, at molestie massa ante nec nisl. Vivamus eu interdum libero.</p>
<div class="spacer-regular"> </div>
<div class="a-center owl-carousel" data-role="product-owlCarousel" data-mage-init='{"OXowlCarousel":{"margin":0,"loop":false,"dots":true,"nav":false,"autoplay":false,"lazyLoad":true,"rewind":true,"responsive":{"0":{"items":1},"640":{"items":1},"1025":{"items":1},"1160":{"items":1}}}}'>
<div class="d-inline-block">
<img src="{{media url="magefan_blog/blog-post-slider-01.jpg"}}" alt="" />
<div class="image-caption a-center" style="margin-top:40px;">Lorem ipsum dolor sit amet, consectetur adipiscing elit. Donec dictum eu turpis ac blandit. Ut risus magna, mattis sit amet erat at, rhoncus aliquet arcu. </div>
</div>
<div class="d-inline-block">
<img src="{{media url="magefan_blog/blog-post-slider-02.jpg"}}" alt="" />
<div class="image-caption a-center" style="margin-top:40px;">Lorem ipsum dolor sit amet, consectetur adipiscing elit. Donec dictum eu turpis ac blandit. Ut risus magna, mattis sit amet erat at, rhoncus aliquet arcu. </div>
</div>
</div>
<div class="spacer-regular"> </div>
<p>Lorem ipsum dolor sit amet, consectetur adipiscing elit. Donec dictum eu turpis ac blandit. Ut risus magna, mattis sit amet erat at, rhoncus aliquet arcu. Phasellus eget tincidunt enim. Sed nec mi velit. Maecenas convallis ante sed risus efficitur, dignissim finibus orci porta. Cras consectetur id nulla accumsan mollis. Quisque nisl sapien, egestas in nisl accumsan, volutpat euismod velit. Mauris iaculis, justo quis tristique iaculis, risus sapien cursus massa, venenatis sagittis lacus tortor eu neque. Morbi eu magna ligula. Nunc efficitur ut est at finibus. Etiam id dui egestas, semper dolor at, facilisis urna. Praesent efficitur velit et turpis venenatis auctor. Phasellus justo ex, finibus pellentesque condimentum maximus, interdum eget leo. Morbi egestas, nibh vitae luctus posuere</p>
</div>
</div>
<div class="spacer-small"> </div>
<div class="container-fluid" style="padding:30px; line-height:0;">
<div class="row no-gutters">
<div class="col-sm-6" >
<img src="{{media url="magefan_blog/blog-post-col-images-03.jpg"}}" alt="" style="width:100%; padding:5px;" />
<img src="{{media url="magefan_blog/blog-post-col-images-04.jpg"}}" alt="" style="width:100%; padding:5px;" />
</div>
<div class="col-sm-6" >
<img src="{{media url="magefan_blog/blog-post-col-images-02.jpg"}}" alt="" style="width:100%; padding:5px;" />
<img src="{{media url="magefan_blog/blog-post-col-images-01.jpg"}}" alt="" style="width:100%; padding:5px;" />
</div>
</div>
</div>
<div class="spacer-small"> </div>
<div class="container">
<div class="narrow-content">
<p>Quisque nisl sapien, egestas in nisl accumsan, volutpat euismod velit. Mauris iaculis, justo quis tristique iaculis, risus sapien cursus massa, venenatis sagittis lacus tortor eu neque. Morbi eu magna ligula. Nunc efficitur ut est at finibus. Etiam id dui egestas, semper dolor at, facilisis urna. Praesent efficitur velit et turpis venenatis auctor. Phasellus justo ex, finibus pellentesque condimentum maximus, interdum eget leo. </p>
<blockquote>
<h3>“Phasellus eget tincidunt enim tristique iaculis.
Maecenas convallis ante sed risus efficitur, dignissim finibus orci porta”</h3>
<h6>John Doe</h6>
</blockquote>
<p>Lorem ipsum dolor sit amet, consectetur adipiscing elit. Donec dictum eu turpis ac blandit. Ut risus magna, mattis sit amet erat at, rhoncus aliquet arcu. Phasellus eget tincidunt enim. Sed nec mi velit. Maecenas convallis ante sed risus efficitur, dignissim finibus orci porta. Cras consectetur id nulla accumsan mollis. Quisque nisl sapien, egestas in nisl accumsan, volutpat euismod velit. </p>
</div>
</div>
Related Posts and Products
Related posts and products should be manually set for each post.
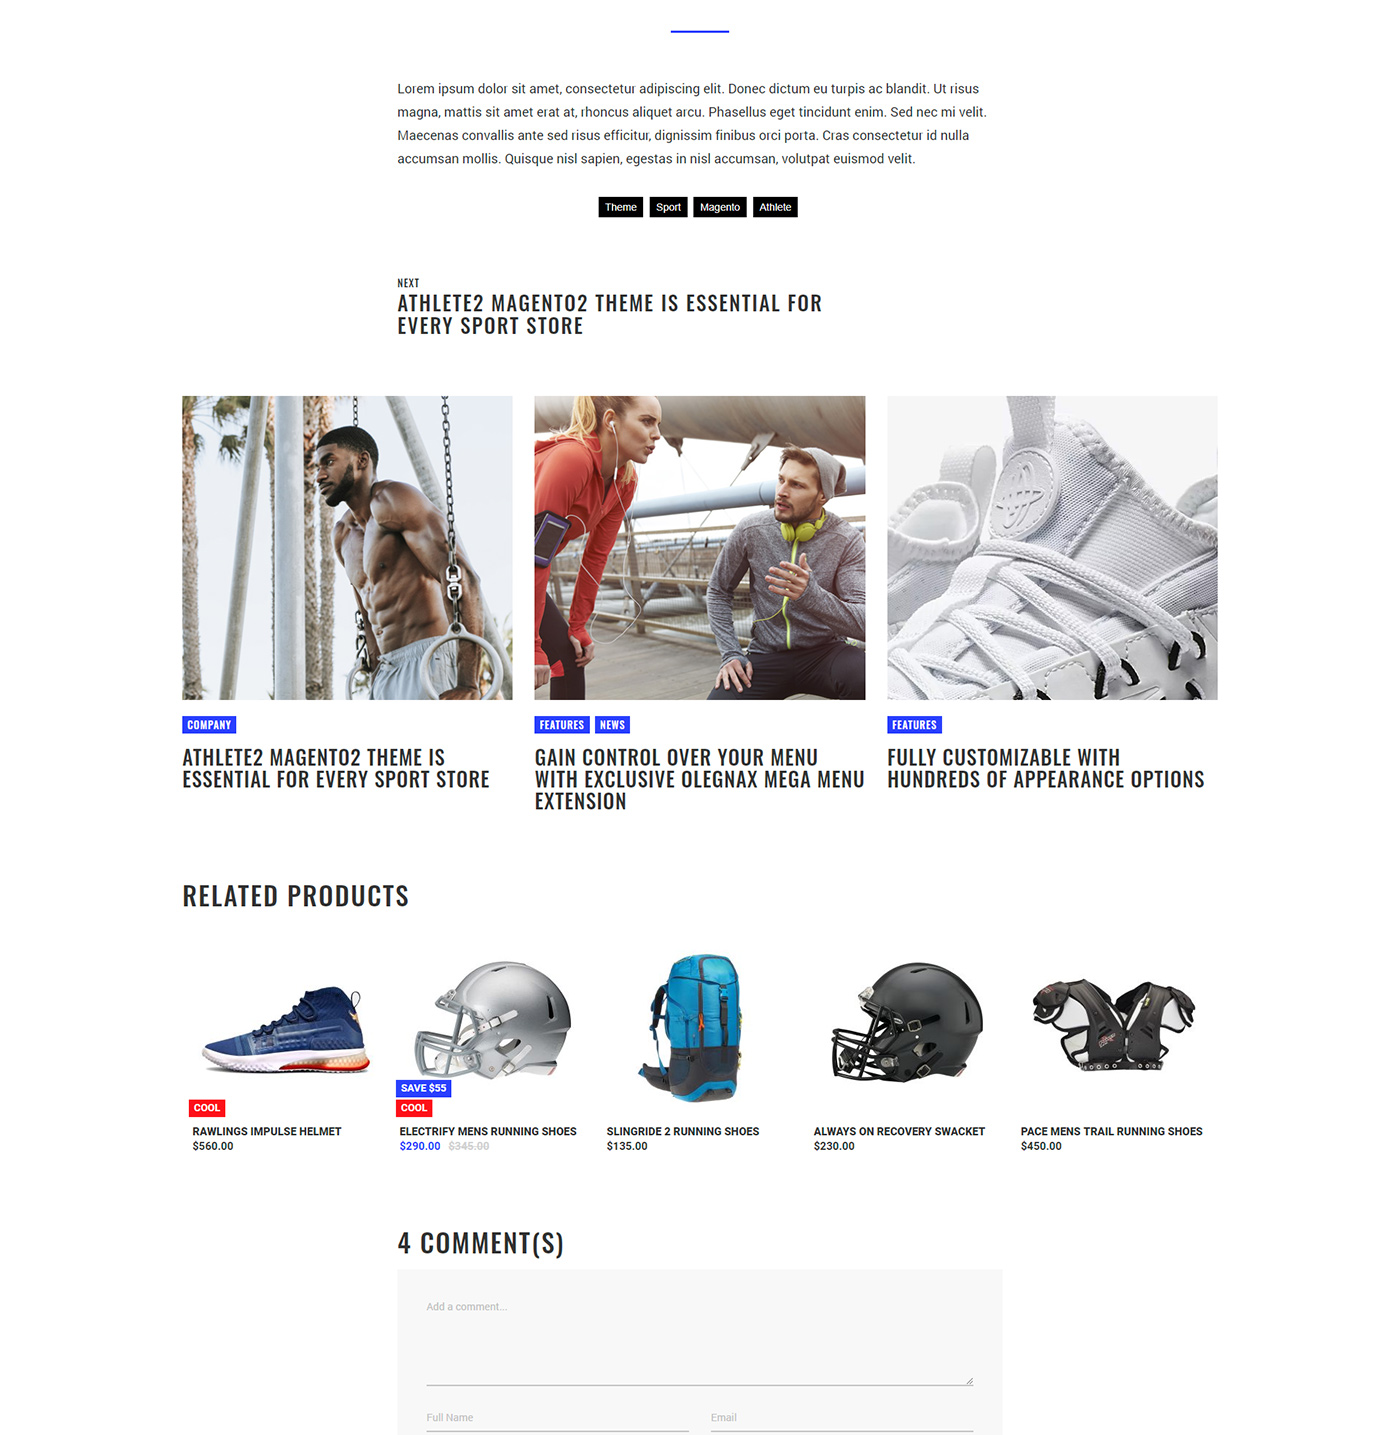
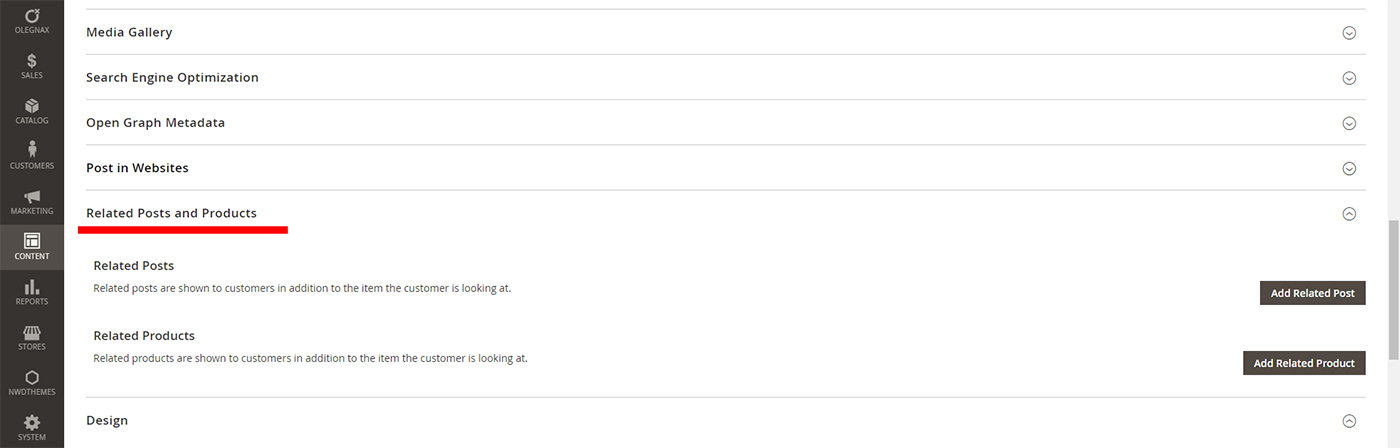
Realted Posts and Products can be set on post edit page Content > Blog > Posts in Related Posts and Products section.
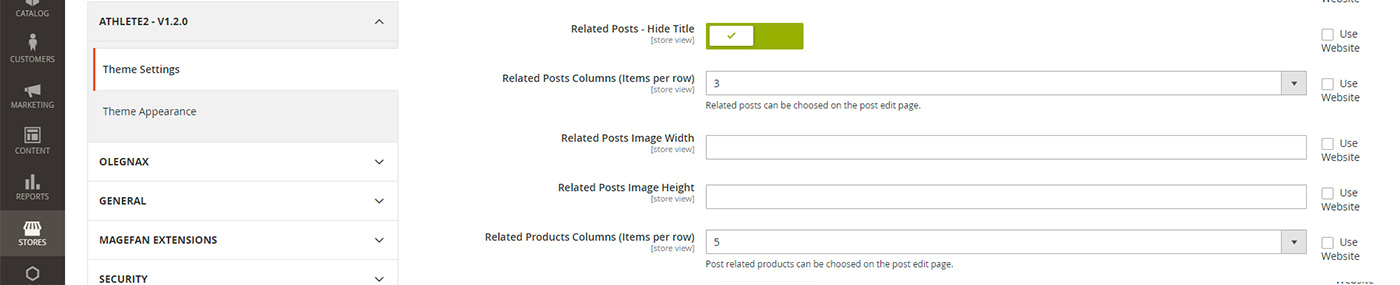
You can set columns (items per row) for Realted Posts and Products in theme options Athlete2 > Theme Options > Blog Post.
Additionally you can set image size for related posts there. Custom image size is usefull when you have images with different ratio on blog listing. If you set image size, images will be croppped to specific size.
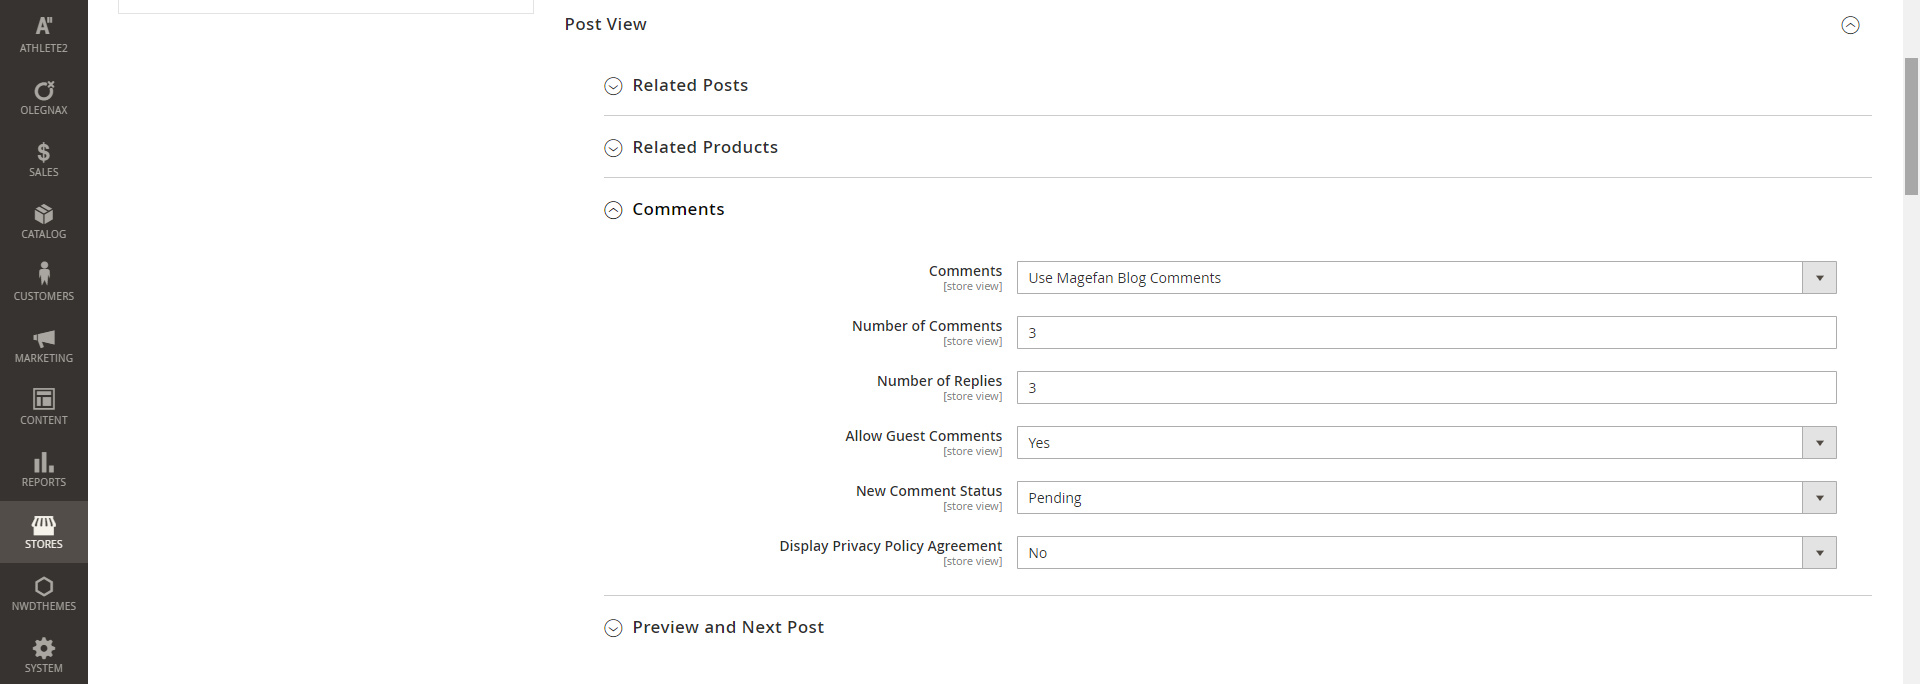
You can choose between different services for comments on your blog post in Magefan Blog Extension settings Content > Blog > Configuration > Post view > Comments.