Getting Started
We would like to thank you for purchasing Athlete2 Theme! Before you get started, please be sure to always check out this documentation. Athlete2 theme can only be used with Magento 2 so we assume that you already have Magento 2 installed and ready to go.
If you are unable to find answer for your questions in our documentation, feel free to contact us via form on our website or themeforest profile page. We'll be happy to help! Thank you, we hope you'll enjoy using Athlete2 Theme!
Requirements
Athlete2 Theme is compatible with Magento Community Edition version 2.3.x - 2.4.x To install this theme, we assume that you already have an installed Magento version 2.3+. If you need help installing Magento 2.x, follow the instructions on Magento official website. Below are useful links:
Very detailed installation instructions of Magento 2.3 and 2.4 with video by digitalstartup: How to install Magento 2.3 and build a web server and How to install Magento 2.4 and build a web server
Theme Installation
1. Backup your Magento files and database. We are not responsible for any data loss.
Creating a backup is very imporant before installing theme, especially when you are working on a live site. Do not ignore this stage!
2. Disable all cache on your Magento site
Go to System -> Cache management. Select all, choose refresh action and submit. Additionally disable any other cache on your server, for instance PHP cache engines, APC, etc
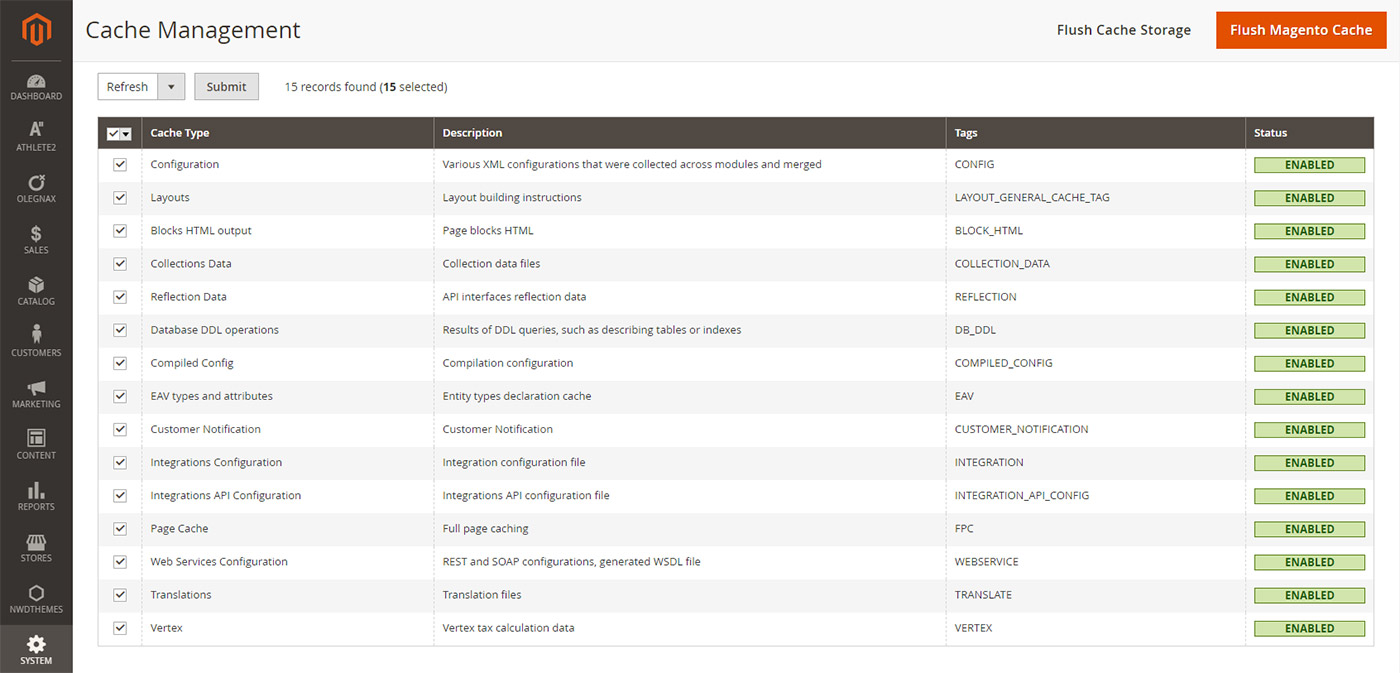
Alternatively you can use command line: php bin/magento cache:clean to refresh cache
3. Download theme package from themeforest, unzip it (Theme Package > Theme Files > Athlet2.zip) and upload app and pub folders to the root of your Magento folder. So content of the app goes to app and pub goes to pub.
You can use some FTP software like FileZilla. Make sure that all theme folders and files has been uploaded successfully.
3.1 Theme Patches.When to install patches: Files in the main theme archive (Athlete.zip) are for the latest supported (at the moment of theme release) Magento version (Currently it is 2.4.5). So, if you are using not the latest Magento verions then you also need to apply patch.
How to choose the right patch. Choose only the patch with your Magento version. E.g.: if you have Magento version 2.3.1 installed, then you only need to apply Patch-2.3.1.zip and not any other. And again if you are using latest Magento version then you do not need to apply any patches.
How to install patches. Patches are located in the same folder as theme (e.g.: Theme Package > Theme Files > Patch-2.3.7.zip) and installed same as theme. To install patch you need to extract files from its archive to the root of your magento folder (so files from app goes to app folder and so on).
3.2 3rd party extension patches. If you are using such 3rd party extensions like: Amasty Improved Layered Navigation, Amasty Advanced Search or Amasty One Step Checkout then you also need to apply patches for these extensions. You can find patches in Theme Package > Theme Files > Amasty_Patches. Extract files from the required (For those Amasty extensions that you have installed) patch archive to the root of your Magento.
4. Login to your server using SSH client (Putty, MobaXterm, etc) navigate to the root of your magento folder and set correct file and folders permissions and ownership. Especially for pub and var folders. Most of the problems are because of ownership, you can set it like this:
sudo chown -R <owner>:<group> <magento root directory path>
i.e.
sudo chown -R magento:www-data /var/www/html
If you are in your magento folder you can simply add dot instead of the path like this:
sudo chown -R magento:www-data .
5. When you ensure that permissions are correct, switch user to Magento file system owner and run following commads:
Run all Magento CLI commands as the Magento file system owner.
- php bin/magento setup:upgrade or a short version php bin/magento s:up.
- Then php bin/magento setup:static-content:deploy -f or php bin/magento s:s:d -f
6. Login to Magento admin panel and switch to Athlete2 theme in Content > Design : Configuration choose where you want to apply theme, to all stores or a specific store view and click Edit. Then choose theme in Applied Theme select field.
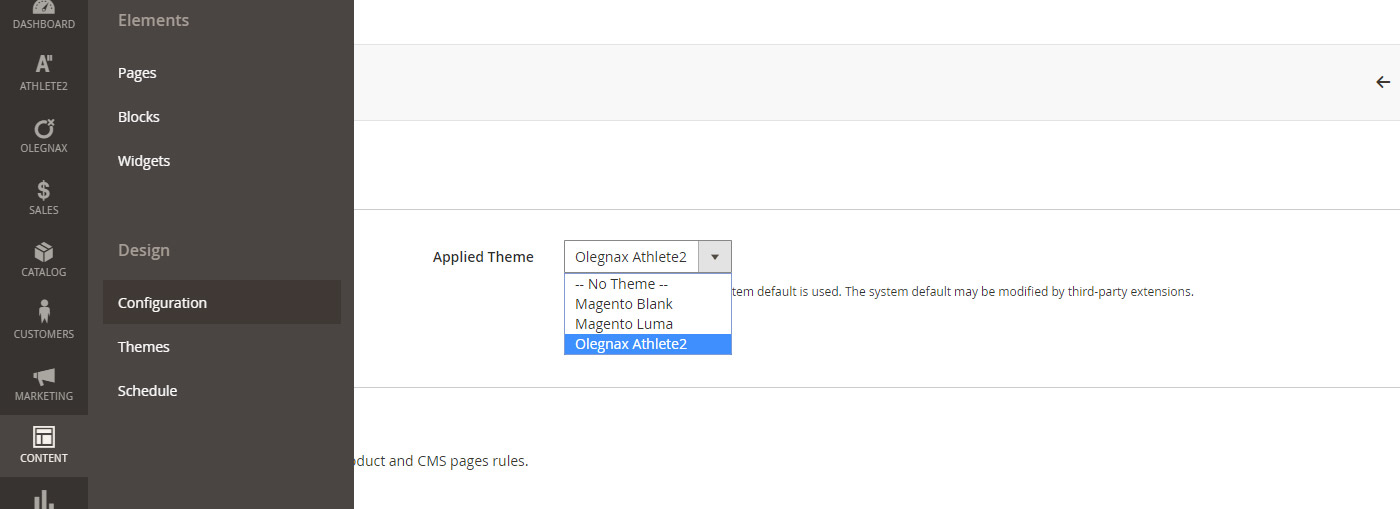
That's it your theme is installed. You can start customizing it or import sample data.
Demo Import
Our theme comes with one click sample data import. You can import theme and olegnax plugins settings, pages, static blocks and banner sliders for each of the demos.
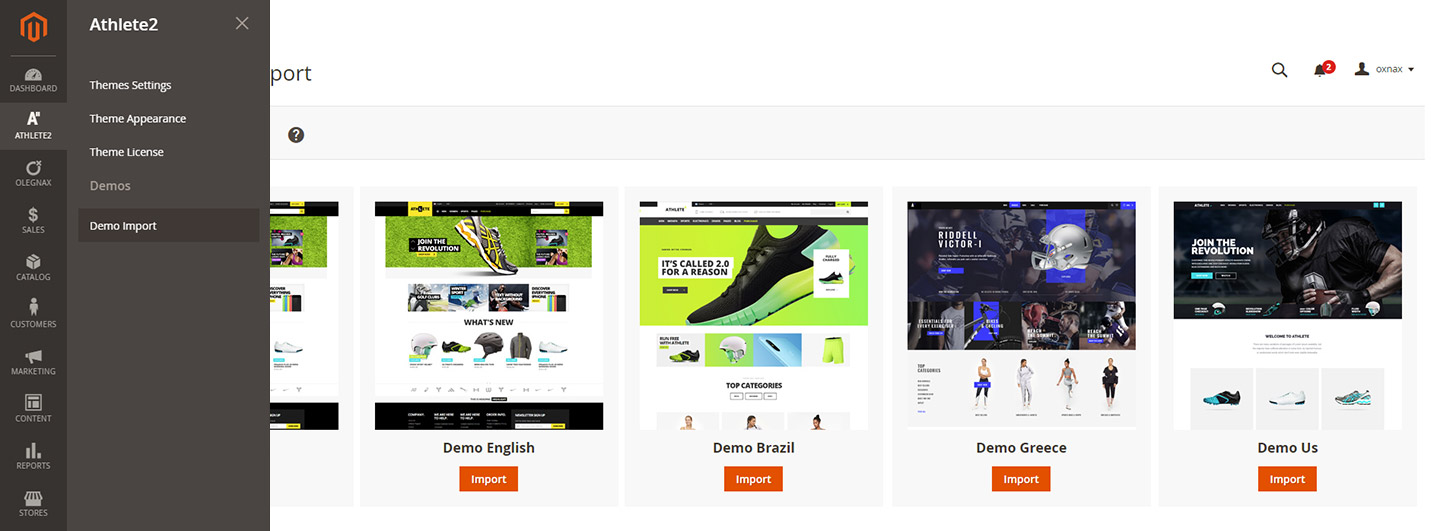
You can import settings, content(pages and static block) and banner slider separately.
Please note that you existing pages and static blocks will be overriden if they has same identifiers. To prevent this mark checkbox "Add items, do not replace", so new pages and block will be added with new names instead of replacing existing.
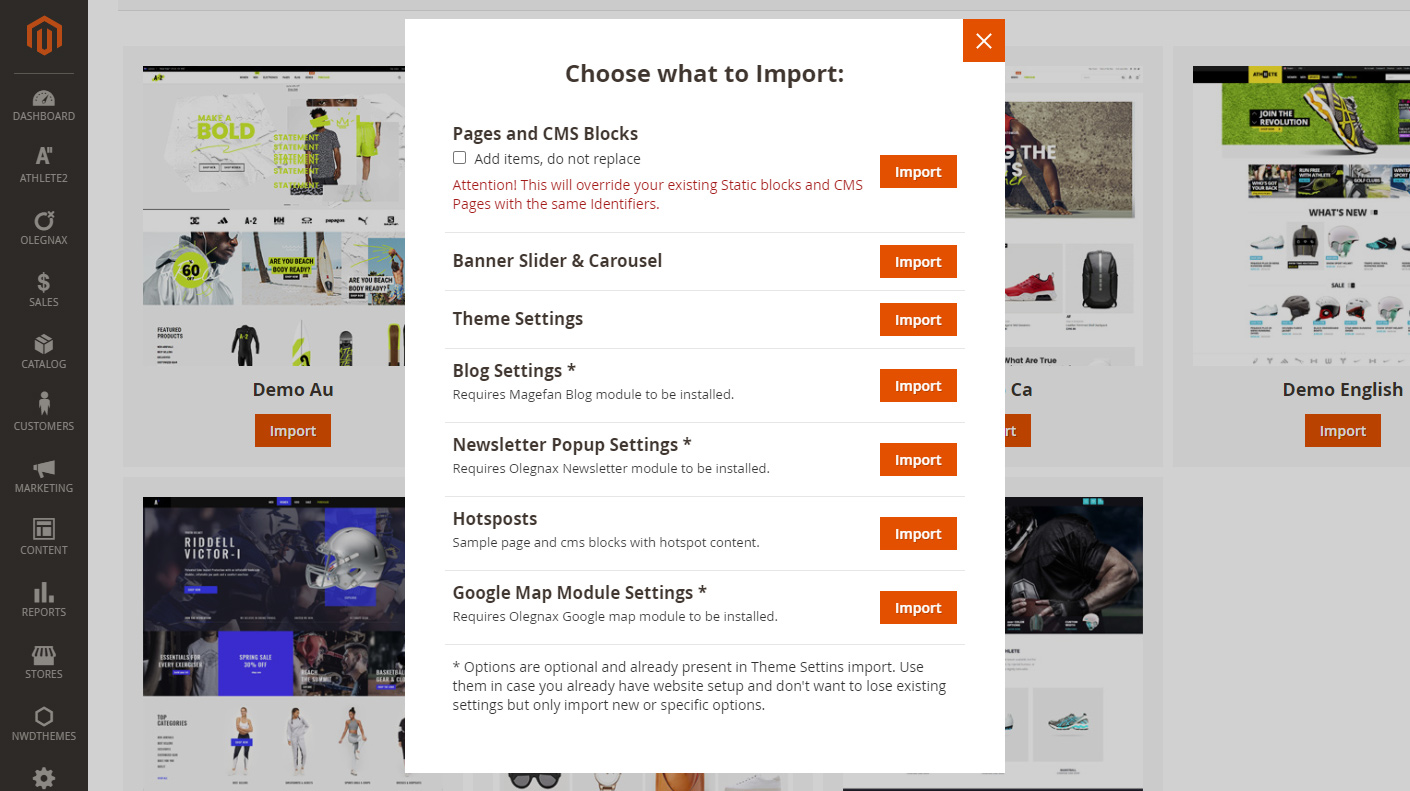
Also you can import theme settings to specific store view. To do this choose desired store view on import page and then click import.

Please note:
Nwdthemes Revolution Slider is a 3rd party extension so its sample slides can't be included in theme import, you will need to import them manually using Revoluton Slider import.
Same as blog posts and categories are not included in theme import becuse blog is a 3rd party extension. You can find sample post content in blog section of our docs.
Also, 3rd party extensions like Blog and Revolution Slider should be installed in separately, addition to the theme in case you need them. E.g. if you plan to import Demo which uses Revolution slider (like US, Greece, etc) then you need to additionally Install Revolution Slider and Import sample slides for the selected demo.
After Import
Sample data will import content and settings but import won't make your website look exactly like on preview. You may need to do following adjustments:
Important by default we disable wysiwyg editor when you import options because it wraps everything in p tag resulting in lots of undesired spaces and also removes empty tags. So keep in mind that content may be corrupted when you switch to visual editor (Show/Hide Editor button)
1. Categories. We do not import categories and that is why we can't import mega menu option. Check Olegnax Mega Menu section of this documentation. You will find sample menu content used in preview there.
2. Categories content. We import static blocks used in our categories but you will need to assign them to specific category after you create it. You can learn how to do this in Categories section of this documentation.
3. Brands. Sample brands images are imported but you need to apply them to your brands attribute. You can check Olegnax Brands sections for details.
4. Product and banner sliders. They are imported but you may need to adjust their id on pages and static blocks.
Navigate to Olegnax > Banners > Groups and check banner group id of the group that you need. If it is your first import on a clean content then most likely it will be 1, same as id in content. In this case you don't need to do anything.

Then open your home page Content > Pages or static block Content > Blocks where the banner slider is located and change banner slider widget slide_group value

For Product sliders widget you need to change category_ids value to the id of your category. You can check category id in Catalog > Categories then choose category and you will see its id in page title next to the name.

Theme Update
Basically theme update is the same as installation.
1. Backup your Magento files and database. We are not responsible for any data loss.
Creating a backup is very imporant, especially when you are working on a live site. Do not ignore this stage!
2. Download theme package from themeforest, unzip it (Theme Package > Theme Files > Athlet2.zip) and upload app and pub folders to the root of your Magento folder. So content of the app goes to app and pub goes to pub.
You can use some FTP software like FileZilla. Make sure that all theme folders and files has been uploaded successfully.
All folders and files from Athlet2.zip should be copied! Pub folder also container theme required files and should be uploaded.
You have to update not only the theme but also extensions.
2.1 Check bundled and other 3rd party extesions like Revolution Slider and Blog. If their versions are newer than those you have installed, then upload their files also.
2.2. If you are running Magento below version 2.4.5 then also need to apply patch. Patch can be found in the same folder as main archive E.g.: Theme Package > Theme Files > Patch-2.3.1.zip. Upload it to the server and unzip it same as you did with the main archive, more details - How to choose and install patch
3. Login to your server using SSH client (Putty, MobaXterm, etc) navigate to the root of your magento folder and set correct file and folders permissions and ownership.
Half of all support requests and issues are related to the wrong permissions and ownership!
4. When you ensure that permissions are correct, switch user to Magento file system owner and run following commads:
Run all Magento CLI commands as the Magento file system owner.
We suggest to swtich to developer mode and clear generated folder, use following commands:
php bin/magento deploy:mode:set developer
rm -rf ./generated/*
Then run this commands:
php bin/magento setup:upgrade
rm -rf ./pub/static/*
rm -rf ./var/{cache,page_cache,view_preprocessed}
php bin/magento cache:clean
php bin/magento setup:di:compile
php bin/magento setup:static-content:deploy -f
Don't forget to clear your server side cache like Varnish, Redis, php-fpm, etc.
5.Additionally
5.1. You may need to update Revolution slider. It is 3rd party extension and not a part off the theme so it has to be updated manually. You can find its files inside of the main archive Revolution Slider folder. Upload the files and run CLI commands. For more details check extension official docs
Same for Blog extension: official docs
5.2. If you run magento version below 2.4 then you need to apply patch - How to choose and install patch. Patch archive can be found in the same folder as main archive E.g.: Theme Package > Theme Files > Patch-2.3.1.zip. If you applied patch after theme update then you need run CLI commands provided above again.
Export/Import Theme Settings and Content
Athlete2 Theme comes with built-in Import/Export functionality which allows you to easily export/import Athlete2 theme, Olegnax extensions, Magento settings, pages, block, etc. from one magento installation to another.
Export:
1. Navigate Athlete2 / Export Theme
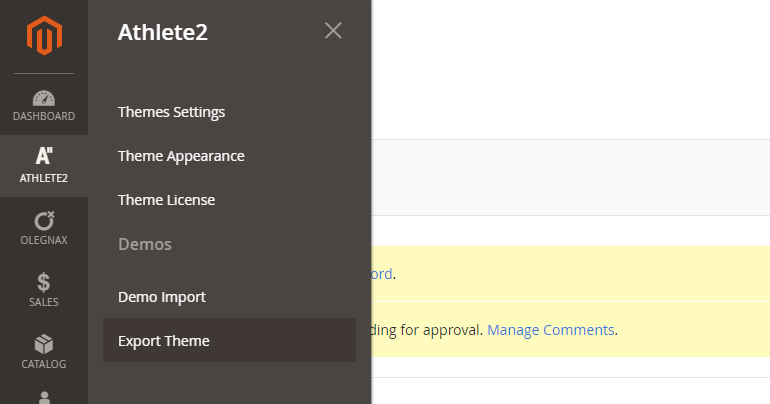
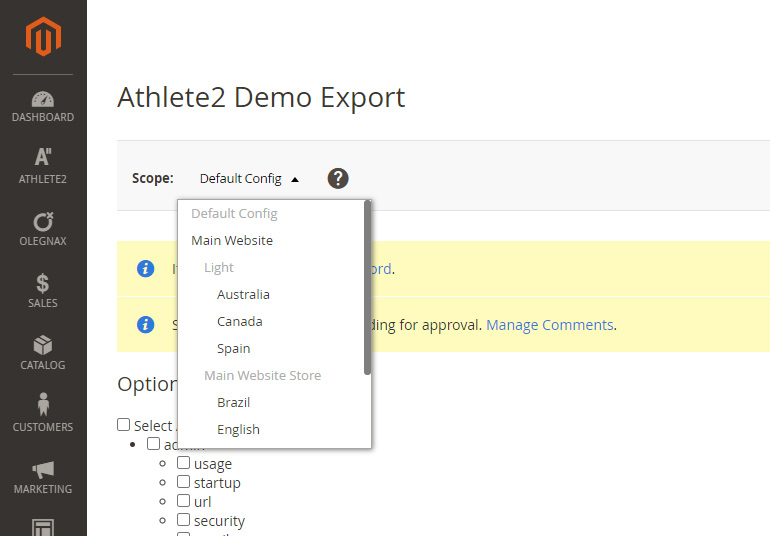
2. Choose configuration scope which you want to export on the top left.
3. Check options which you want to export. Note that you can also export settings from 3rd party extension but the results are not guaranteed. You don't have to export all in single move/file. We suggest to do this the same as we do in our Demo Import. Export settings, content and slides separately.
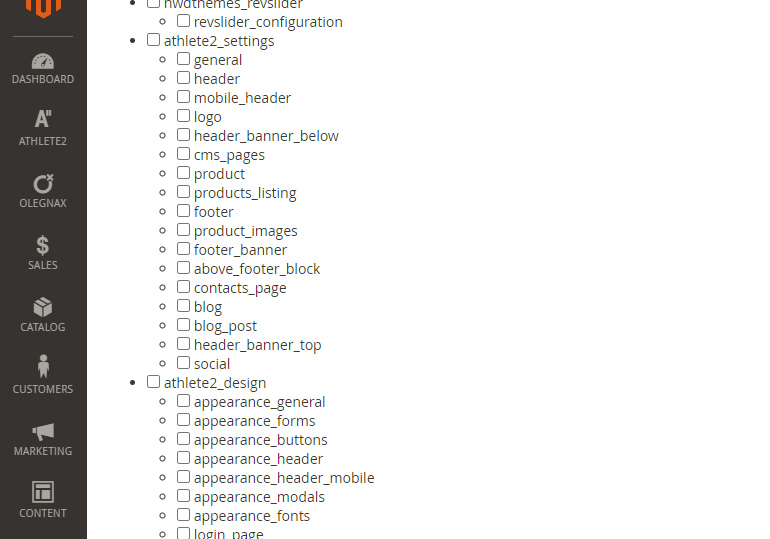
Note that you can export/ import Olegnax Banner and Carousel slider exntesion slides. You can find them in a separate section, see image below.
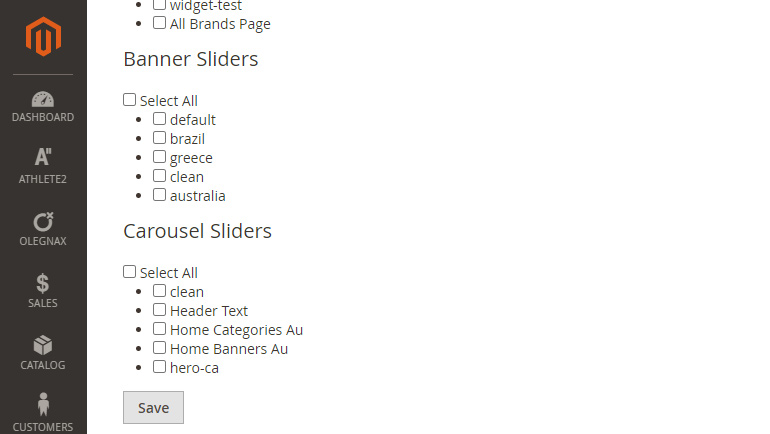
4. Click save. Settings will be imported to app\code\Olegnax\Athlete2\Demos so you need to add write permissions for this folder. The name of the saved files will be same as selected configuration scope.
Import exported settings:
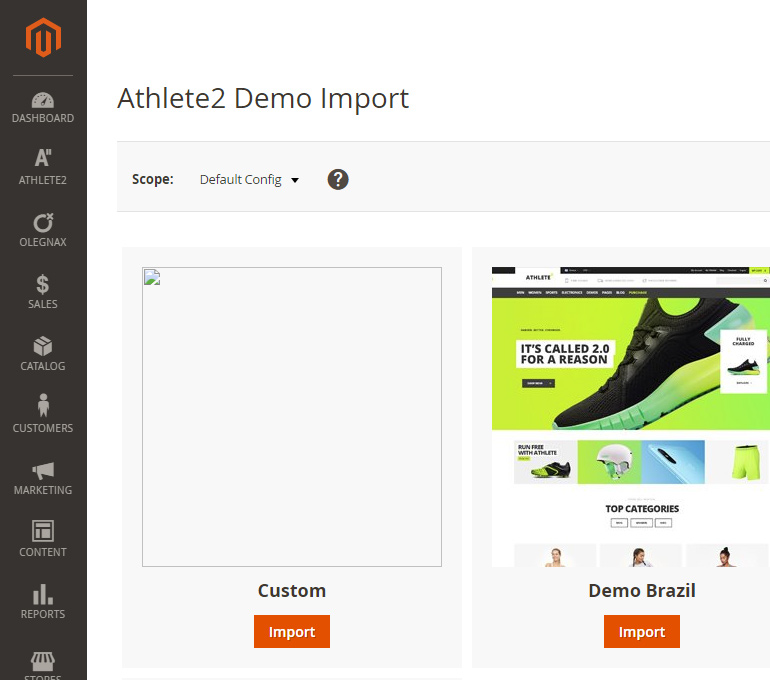
5. Create folder with any name in app\code\Olegnax\Athlete2\Demos. E.g.: app\code\Olegnax\Athlete2\Demos\Custom
6. Rename file created with export (e.g.: app\code\Olegnax\Athlete2\Demos\demo-default-config.xml) to one of the following: settings.xml, content.xml or bannerslider.xml depending on what you exported. If you exported all together just call it settings.xml
7. Place it in your newly created folder, in our example it is called "Custom" e.g.: app\code\Olegnax\Athlete2\Demos\Custom\settings.xml
8. After that you will see "Custom" demo import block in Athlete2 / Demo Import.
